Demonstration 31 Part 1
Demonstration 31 illustrates how to use multiple pages with forms. This lesson will consist of 3 separate parts, one part per form page. In this demonstration part 1 you will learn how to:
• Create a table to hold your form data
• Create SQL completion events that will update/insert data to your table
• Link multiple forms together
• Create "Back" and "Continue" buttons to navigate through pages on your multiple forms
• Demonstrate a confirmation page on the last page
Note: multipaged forms allows users to go back and forth between pages, if you need a simpler multipaged form please refer to Demo 10.
Getting Started
Part 1
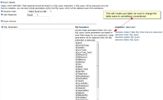
Create an instance of Dynamic Form's and add fields to it. These fields will be the values added to your database. Be sure to make the short name's of your question fields conventional. You will be referencing these short names as tokens such as $(shortFieldNames) in your SQL coquery.
Part 2
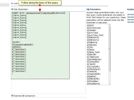
You will create a database table to hold the data that will get transfered to the results page on the last part of this demonstration. You can create the table by making a "Dynamic SQL Statement Event". After you create a SQL event, look for the "Assistance- What's This?" and under this you will find a link that states "Generate Create Table SQL(One time only execution)".
How to create a table:
Click this link and this will create a .txt file with SQL script that will create a table to hold your data. You may want to modify the name of the table to a conventional name, then Copy/Paste the SQL from the .txt file into HOST -> SQL and execute the script. Now you have a table ready to store your data. In this demonstration I am going to name the table Demo31.
Part 3
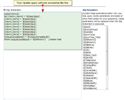
You will need to create an insert and update SQL completion event to save the data from your form into your table. Lets start with the Insert statement, when the form is submitted("Next") the Insert statement will take the data from the filled out form and store it into this table "Demo31".
SQL query for the Insert:
The reason you will have an Update SQL completion event is to account for the second form's button that allows the user filling the form to go back to the previous form. So we will have this query to Update any information if they choose to change any of their information on the first form.
SQL query for the Update:
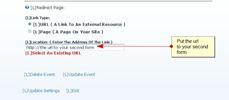
You will create a redirection event in either "Module Configuration -> General Settings" or create a Completion Event to handle redirection of the page when submitted.
Module Configuration( page redirection ):

Completion Event ( page redirection):
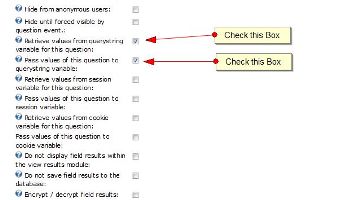
You will now add a hidden field name DSParam1. This will account as an URL parameter, you will need this hidden field in order to have a multiple form project. DSParam1 will be a hidden field in each of your forms, so be sure to add this to every form you have. You will need to go to the "Advanced Field Options" of this hidden field and check the checkboxes that are labeled: "Retrieve values from querystring variable for this question" and "Pass values of this question to querystring variable"
You will also want to add a SQL Default to your Hidden Field using the SQL below to generate a random string(UniqueID to associate to a specific record):
Select NewId() As DefaultValue
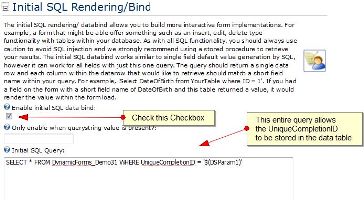
You will need to go to the SQL Rendering/Bind in Module Configuration, SQL Rendering will be covered in Part 3 of this demonstration. Add the following features:
SQL Rendering/Bind
Summary of Demo 31 Part 1:
• You have learned how to create a table to store all of your information from your forms
• You have 3 completion events, one redirection event and two SQL completion events. One SQL completion event to insert into the database table, and one to update the users information if they decide to click the back button on the next form
• You have learned how to add the hidden field named DSParam1and use it
This concludes Demo 31 Part 1. Please continue on to Demo 31 Part 2 to further understand how to navigate back and forth through multiple forms. If you have any questions or comments please add a comment at the bottom of the page.
To get to part 2 of this demonstration, you will need to fill out the form and submit it.