Tutorial on how to implement custom CSS
As you can see in the above form that there is some custom CSS applied that do not come with standard dynamic forms, but can be easily edited/aquired according to your needs. The form above might feel a little difficult to create but actually it is just the matter of playing creatively with the options that Dynamic form offers. The most beautiful part of the Dynamic forms is that it creates its own standard CSS that can be edited anytime to make the page look the way you you want to see.
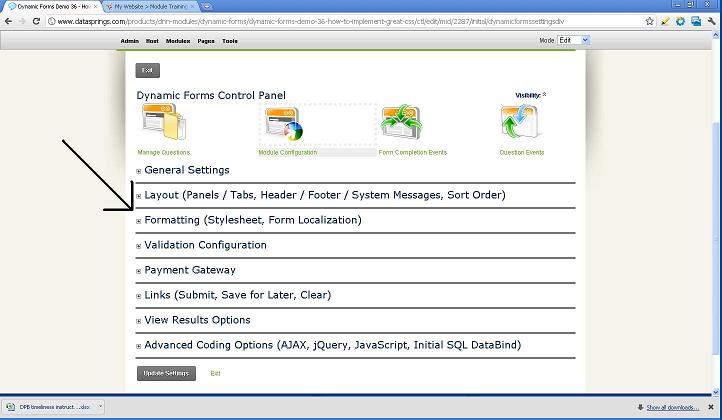
Here we will guide you how you can create/add the dynamic forms and where to edit the necessary CSS to look the way as it can be seen above.
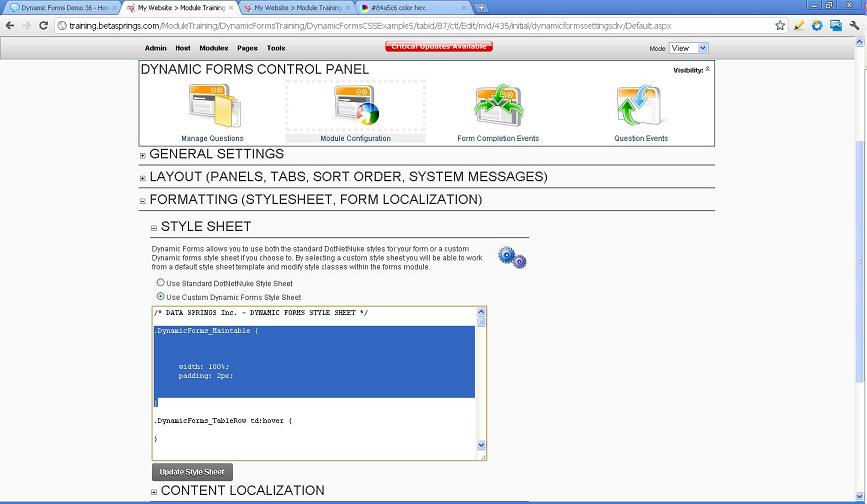
You are already familiar how/where to create a module and add the required fields using the "Quick Add (Drag/Drop) " menu. In doing all the process the CSS for each step will itself be written at the backend. There is a standard CSS that the system generates which can be edited anytime. To edit the CSS or even uploading your own style sheet you will need to navigate to module configuration under "Dynamic Form Quick Menu". Once there you will find the dropdown list named "Formatting (Stylesheet, Form Localization)".
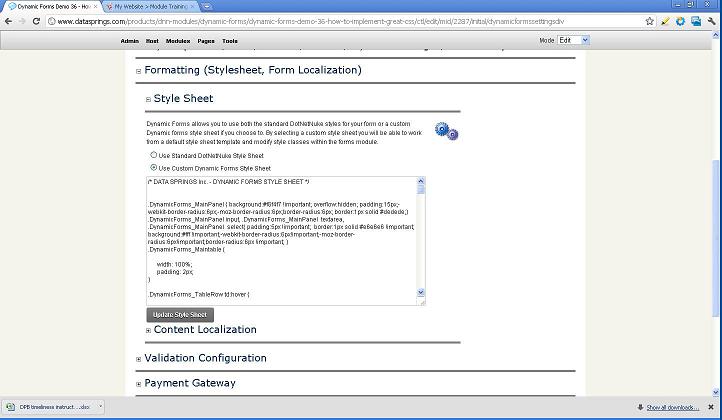
You will see that the default is "Use Standard DotNetNuke Style Sheet". If you select the option "Use Custom Dynamic Forms Style Sheet" you can actually see and edit the whole CSS that the current page is using. You can edit the style the way you want see like changing the background color, creating rounded text box etc.
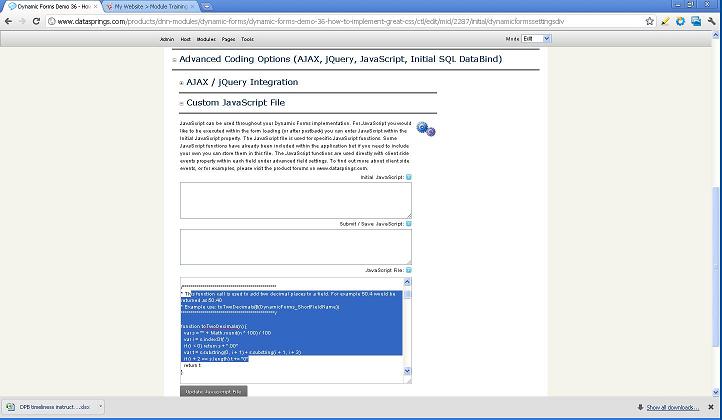
Same can be done for JavaScript, JQuery, etc under "Advanced Coding Options".
Isn't it a simple way that Dynamic form creates everything for you and with just little tweaking you can make the look and feel the way you want to?
Few Examples
Now we are fully aware of how and where to edit the standard CSS. In this step we will go through few examples and edit the standard CSS to give it a new look.
Note: This tutorial is for those who do not have a firm grip on writing/applying CSS.
An easy way to edit existing CSS is to use "Inspect Element" option in Chrome or you can use "Firebug" as well. These tools will give you easy access to source code of your page. "Inspect Element" option will be there by default if you are using chrome browser.
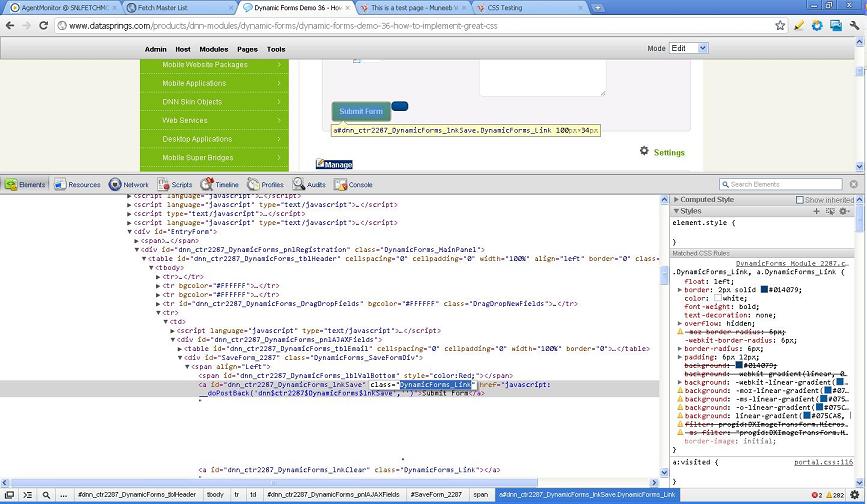
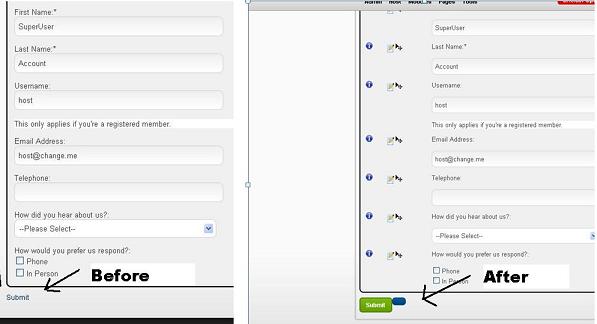
With that said let's start applying some custom CSS to "Submit" button. Please have a look at "submit" button above it is of blue color and it changes to green when a mouse is hovered. This is because of the CSS that is being applied, if we go with the default there would only be a hyperlink sort of navigation that comes with dynamic forms, see the snapshot below:
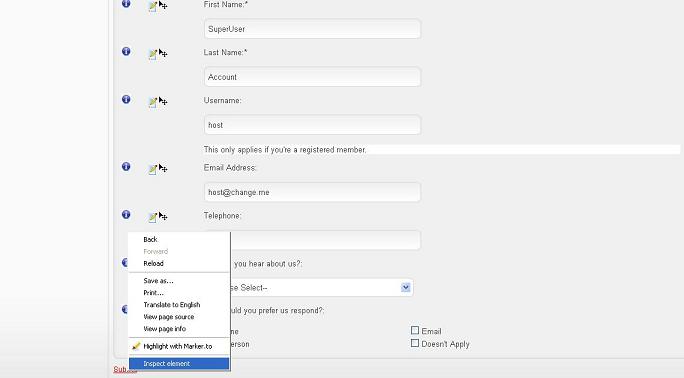
As you can see if we right click on the submit link and select "Inspect element" you will be able to see the class used from each field. As evident in the snapshot you can view the class "DynamicForms_Link". Make sure you have changed the style sheet settings to custom under module configuration, in standard CSS there can be problems in identifying the class.
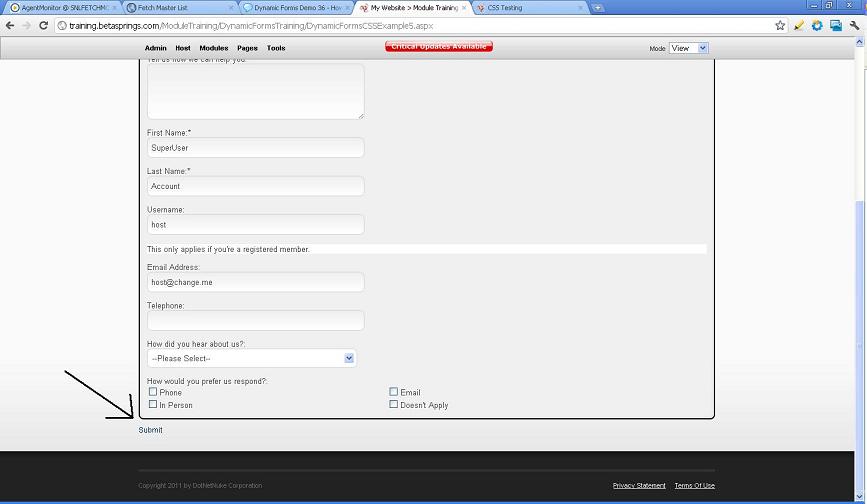
Now see the below snapshot where the submit button is not dynamic and we will apply some custom CSS on this page.
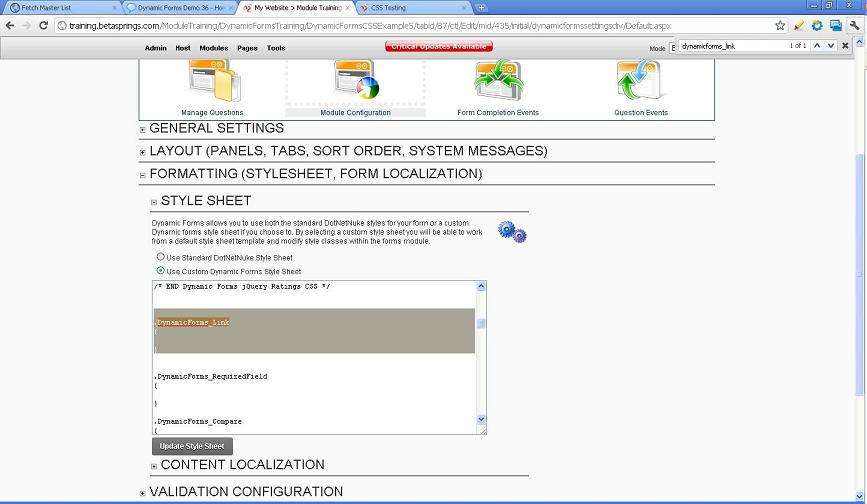
Once the settings are edited to "Use Custom Dynamic Forms" you will be able to find the class ".DynamicForms_Link" as shown in the snapshot. You will observe that there is no CSS applied on the link class. The custom CSS must have to be added between the curly bracket " { }". Please note there will be separate classes for separate fields.
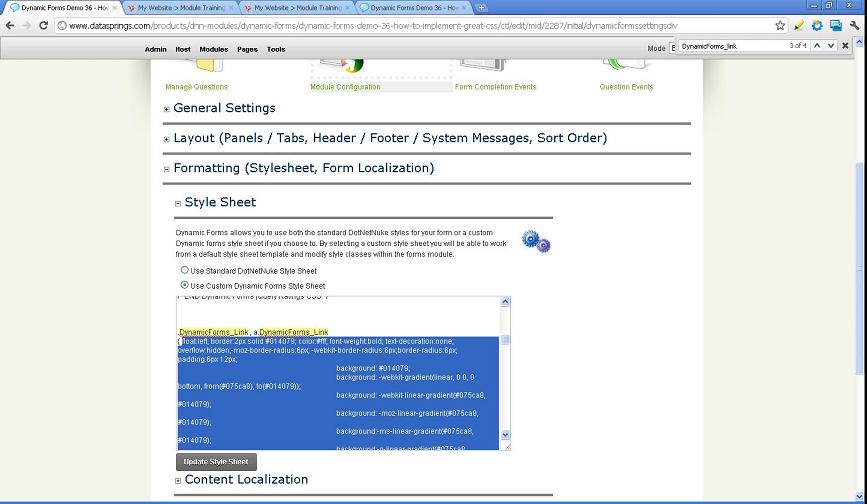
Now we will paste this code between the brackets to make the submit link look like the way it is in the above form.
float:left; border:2px solid #014079; color:#fff; font-weight:bold; text-decoration:none; overflow:hidden;-moz-border-radius:6px; -webkit-border-radius:6px;border-radius:6px; padding:6px 12px;
background: #014079;
background: -webkit-gradient(linear, 0 0, 0 bottom, from(#075ca8), to(#014079));
background: -webkit-linear-gradient(#075ca8, #014079);
background: -moz-linear-gradient(#075ca8, #014079);
background:-ms-linear-gradient(#075ca8, #014079);
background:-o-linear-gradient(#075ca8, #014079);
background:linear-gradient(#075ca8, #014079);
filter:progid:DXImageTransform.Microsoft.gradient( startColorstr='#075ca8', endColorstr='#014079',GradientType=0 );
-ms-filter:"progid:DXImageTransform.Microsoft.gradient( startColorstr='#075ca8', endColorstr='#014079',GradientType=0 )";
You would have observed in the above form that the submit button changes its color to green whenever mouse is hovered over it. To do this you have to include the "hover" clause for DynamicForms_Link and include the CSS for the same. Here is what needs to be included:
.DynamicForms_Link:hover , a:hover.DynamicForms_Link
{ float:left; border:2px solid #507e02; color:#fff; font-weight:bold; text-decoration:none; overflow:hidden;-moz-border-radius:6px; -webkit-border-radius:6px;border-radius:6px; padding:6px 12px;
background: #649d01;
background: -webkit-gradient(linear, 0 0, 0 bottom, from(#7cb913), to(#649d01));
background: -webkit-linear-gradient(#7cb913, #649d01);
background: -moz-linear-gradient(#7cb913, #649d01);
background:-ms-linear-gradient(#7cb913, #649d01);
background:-o-linear-gradient(#7cb913, #649d01);
background:linear-gradient(#7cb913, #649d01);
filter:progid:DXImageTransform.Microsoft.gradient( startColorstr='#7cb913', endColorstr='#649d01',GradientType=0 );
-ms-filter:"progid:DXImageTransform.Microsoft.gradient( startColorstr='#7cb913', endColorstr='#649d01',GradientType=0 )";
}
With that done the submit link would look the way we were looking for. And yes you can choose whatever colors you like to see in your forms. The numeric digits with "
#" signs are actually the codes for different colors which can easily be searched over internet. Let's have a look to see the results of the changes that we made:
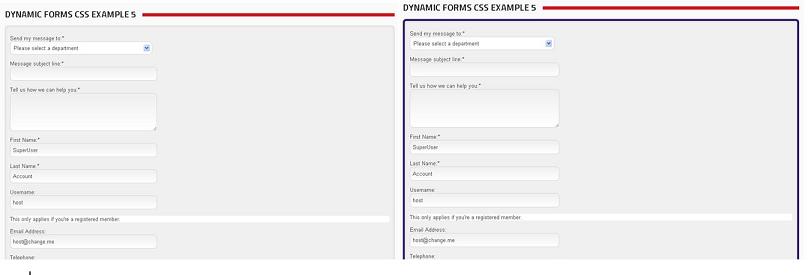
Now we will apply some CSS on the overall panel of the form. This is a very simple thing do. As always, right click anywhere in the empty area of your form and select "Inspect Element" to see the class. Normally for the main panels in dynamic forms the class should be "
class="DynamicForms_Maintable" or "
class="DynamicForms_MainPanel". In our case it is "DynamicForms_Maintable", we will search the same in our custom CSS under module configuration. As you can see in the snapshot below that there is nothing in the brackets other then width and padding for the forms.
Let's apply a border around our form. All you need to do is to paste this simple CSS between the brackets:
border: 5px solid #84a5c6!important;
As you can see it's very simple, you can adjust the size of the border by changing the value of pixel and off course you can use different colors. Please note that sometime you may need to tell the CSS that what script is to be given preference, especially when the page is using a separate style sheet for CSS. As you can see above that we have included "
!important" after the CSS code, this special clause will override all other scripts for this particular field and apply the one mentioned above. Let's see how this simple code has appeared in our form.
As you have see that how we added a blue color border around the form. In the same fashion you can change the background color of your form. Here is what we have to include this time:
background-color: #b1c0fc!important;

This way you can build to learn minor tweaks to make the dynamic forms more interactive and bright.
Would you like to setup your form just as this demonstration is setup? If so simply download this template and copy it to your DNN Portals Home Directory to use the IPORTABLE feature of the module (Select Import Content from the module menu and import the template):
|