Wordpress 3.0 Installation Guide
So you decided to try WordPress 3.0, Beta 1 and either you are new to Wordpress, you are having problems installing, configuring or running it, I’m going to present a step by step demonstration of the process. The days when Worpress was just a cute practical blogging platform are way in the past now. The power of this CMS make him a good option no matter what do you intend to do with it: from a simple blog, to a news site, an online store, a download center, buy and sell, online actions or, why not, a porn website. It’s true, we have Joomla or Drupal there, we have Magento or OS Commerce for e-shops but it very much depends on the specifications of your project. For example, I’m a big fan of Magento and if I want a big online store, with thousands of products, a lot of attributes, all the payment methods in the universe etc. I would definitely use Magento. But if you are under the brilliant idea that the old Lemonade Stand should move online, than Worpress is the way to go. But let’s back to the subject and see how to install WordPress 3.0 Beta 1.
I will cover the most common method that implies using a hosting service. The tech requirements for Worpress 3.0 Beta 1 are very simple and almost every hosting service on the planet already is fulfilling this simple list:
• PHP 4.3 or greater
• MySQL 4.1.2 or greater
• The mod_rewrite Apache module
If you are planning to host your website on your own computer I recommend the use of Wamp http://www.wampserver.com/en/ or XAMPP http://www.apachefriends.org/en/xampp-windows.html. They both come with everything you need - Apache, MySQL, PHP -, you will just have to do some configuring and you will have your own personal data center.
OK, whatever method you went for we should be at the first step of the process now. Get WordPress 3.0 Beta 1. To avoid getting lost in the Wordpress website we ask Google for “Wordpress 3.0” and we find out that the download is available here. http://wordpress.org/wordpress-3.0-beta1.zip
Like I said I will demonstrate this on a hosted domain. So the next step is to upload the zip file. You can do it using a FTP client, I recommend Fillezila, or from the web hosting control panel. My hosting provider is using cPannel so I type in the address bar www.domain.xx/cpanel, log in, go to the File Manager – down in the Files section – and upload the wordpress-3.0-beta1.zip in your public_html folder. If you want to install it somewhere else create a new folder, let’s say “blog”, upload the file there and after the installation process will be ready you will be able to see your wordpress website at the address www.domain.xx/blog.

After you extracted files from the archive and moved them in the preferred folder it’s time to move to the next phase. I used the root folder, “public_html” so I just have to type the address, www.domain.xx in the browser.
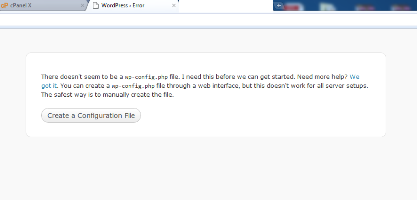
In the first screen Wordpress wil ask you to create a configuration file and all you have to do now is to click on the Create a Configuration File button. The next thing to do is to provide the database in formations.
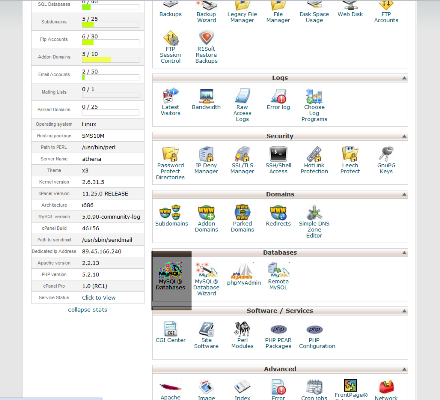
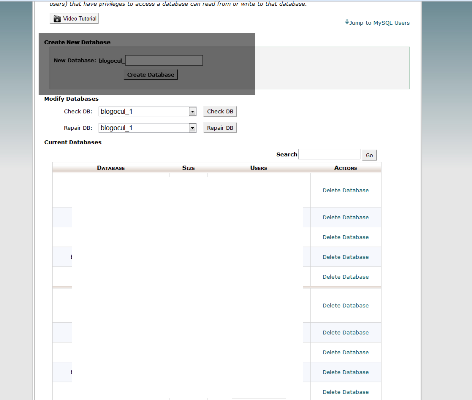
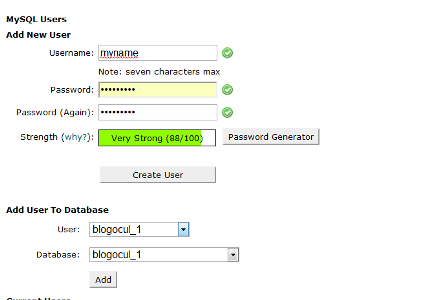
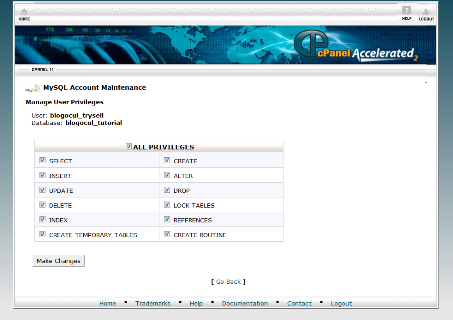
To create a new database you just have to go to the cPanel page, and in the Databases area click on the icon above the “MySQL Databases”. Here you will give chose a name for the new database, you will set up a new database user and in the end you will associate the name with the new database. Click on the ALL PRIVILEGES box and then the “Make Changes” button and you are done here.
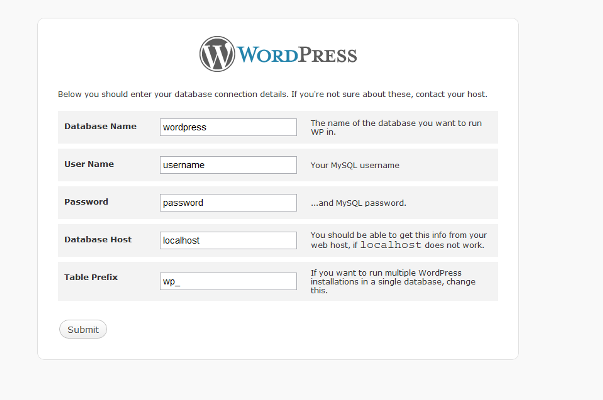
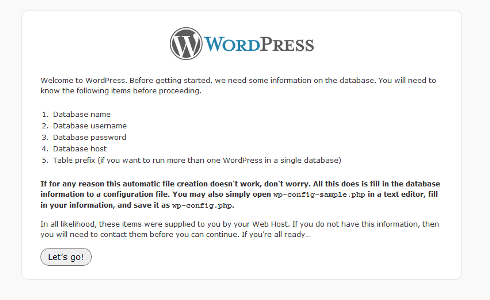
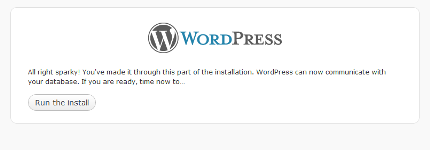
Now go back to the WordPress 3.0 Beta 1 install and provide the information’s you just configured: database name, user name and password. I recommend you don’t make any changes to the “Table Prefix” and “Database Host” fields. The setup will now write a configuration file in the installation folder and you will be moved to next screen when you will be informed that the database setup is now history and it’s time to “Run the install”.
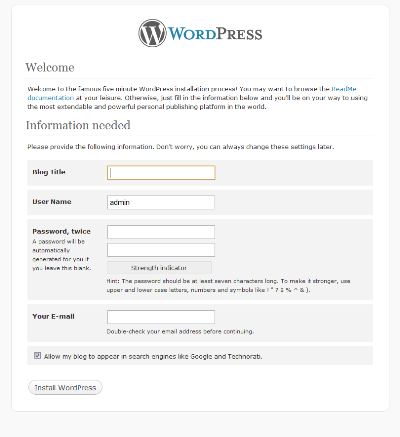
The next screen will ask you for a title for your website and also a username and a password that you will use to access the admin section, from where you configure the website, post, edit articles, add users and plug-ins etc. After that you click on the “Install Wordpress” button and in a second you will be announced that WordPress 3.0 Beta 1 was successfully installed and you are provided with a “Log in” button. Like in all the screens during this process is the only one so it is impossible to go wrong.
As you can see, in spite the long text wrote with the intention to help even the less experienced user, is a simple process that normally only takes a few minutes.
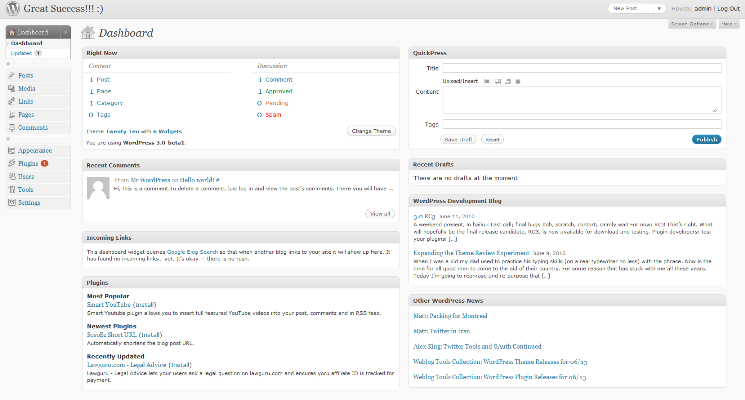
With WordPress 3.0 Beta 1 installed you can access the address of your domain and take a quick look on what your visitors will see when they will go to www.domain.xx. Of course, now it is time to configure WordPress 3.0 Beta 1 so the result will match your intended look and functionality for your domain.

At the end of the installing process you had the option to log-in. You can arrive in the same place if you use the log in link from the front page or type in the address bar: “ www.domain.xx/wp-admin”. Once in the admin it is very easy to configure anything, as simple as working with a local program. Everything is clear and simple but it’s always a good idea to have a back-up from time to time, especially when you decide to install a plug-in that is not so popular, wasn’t recently updated or has a poor rating.
Like I said before every website has to important components: functionality and design. On the functionality part, WordPress 3.0 Beta 1 offers now what WordPress MU alone used to bring us: multi network support. This means that we only need one WP install for multiple websites, no matter what is their use: blogs, e-shops, news websites etc. The only condition is that the WordPress address (URL) is the same with the site address (URL). Here - http://codex.wordpress.org/User:Andrea/Create_A_Network – you can find all the steps necessary to create a network. This is very helpful in case you want to have, let’s say a family blog, and you domain is smith.info. You can add subdomains and with one install you can manage john.smith.info, marry.smith.info, papa.smith.info, hollyday.smith.info, forsale.smith.info, portfolio.smith.info, all with different configurations. On the bigger scale one example I could think of is to have a corporate site, mycompany.com, and shop.mycompany.com, jobs.mycompany.com, blog.mycompany.com etc. One platform that does this with great success is Magento, one install and admin can manage multiple stores and it’s a great step made by the guys behind Wordpress.
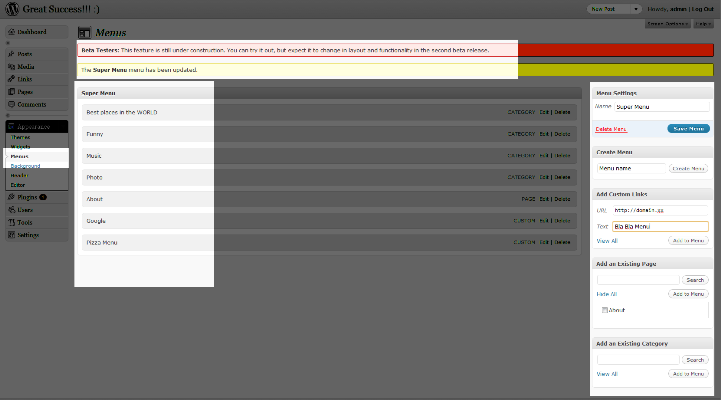
Another important addition in WordPress 3.0 is the Menu Managment. Very simple to use this allows you add and customize new items in the menu list with a simple drag-and-drop. The items can be an external link, a category, a page etc. It is really good to see that the developers of WP have taken in consideration this tool, very demanded by the community.
Now let’s some of the nice plug-ins that work with WordPress 3.0 Beta 1. By default, we have Akismet and Hello Dolly, the last one being good for nothing so it gets the uninstall treatment. Some cool plug-ins, very useful to your website irrespective of the website’s genre, are:
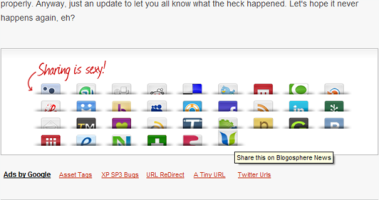
SexyBookmarks - extremely useful and successful tool in getting your readers to actually submit your articles to numerous social bookmarking sites.

All in One SEO Pack - Optimizes your Wordpress blog for Search Engines (Search Engine Optimization)
.
Google XML Sitemaps - This plugin will generate a special XML sitemap which will help search engines like Google, Bing, Yahoo and Ask.com to better index your blog.
WordPress Related Posts – This one will generate a related posts list using WordPress tags.
WP Super Cache - This plugin generates static html files from your dynamic WordPress blog. After a html file is generated your webserver will serve that file instead of processing the comparatively heavier and more expensive WordPress PHP scripts.
Lightbox Gallery – This plugin will generate a special XML sitemap which will help search engines like Google, Bing, Yahoo and Ask.com to better index your blog.

One of the following if you want to turn your WordPress into a shopping cart:
Wordpress eCommerce, Wordpress Shopping Cart Plugin, YAK For WordPress , ShopperPress, PHPurchase.
When it comes to themes, due to the popularity of Wordpress, we cannot complain of the lack of options. WP comes with a new default theme Twenty Ten (2010). One important difference for this new default theme is the increased number of positions that you can customize. Now you can add widgets in the two spaces poisoned in the sidebar and four areas down in the footer. It’s cute and simple, you can change the header with any image you want from the admin/Appearance, but for those who want to make their website look like a million bucks here’s a list with 40 FREE themes that are worth taking a look:

Album Theme
AppCloud Theme
Berita
Blog Theme
Calmdream WordPress Theme
Cardeo Minimal
Cool Retro
Debug Theme
Destyle Theme
Folio Elements Theme
Futurosity Aperio Prototype
Futurosity Vero
Gallery WordPress Theme
Glassic
H5
ImpreZZ
Inuit
Jungleland Theme
Life Collage
Magazeen
Mainstream Theme
Manifest
Mobile Theme
Monkeypr Theme
Mystique
Obscure WordPress Theme
Paper Wall
PolaroidPress
Portfolio Theme
Pyrmont V2 Theme
Rusty Grunge
Shalom Typo
SimpleCart(js)
Wu Wei
Zinepress Theme
There’s also a list of known errors in WordPress 3.0 Beta 1, but before you get mad take another look at that “Beta” word in the title. I’m sure that but the time the testing period will be over we will have a minimum number of unpleasant surprises. One common error is that in some cases you will get an error when you will try to install or update a plug-in.
Fatal error: Allowed memory size of 33554432 bytes exhausted (tried to allocate 5647 bytes) in /home1/domain/public_html/ wp-includes/formatting.php on line 1216
The only proved to work solution for this problem is an email for your hosting provider. Most of them will understand and fix this Apache related issue.
This being said I hope that the infos above are to great use to you and you can enjoy WordPress 3.0 starting even with Beta 1 – you can easily upgrade later. It’s great to see this platform reaching a new level and I hope you will end up with some nice websites using it. Best of luck.
|