|
Deployment for 2007 Microsoft Office
SharePoint Server
A server farm typically consists of one or two back-end database servers and one or more front-end servers that provide Web services and Office SharePoint Server 2007 services, such as search, Excel Services, and indexing.
Hardware and software requirements
Before you install and configure Office SharePoint Server 2007, make sure your servers have the recommended hardware and software. To deploy a server farm, you need at least one server computer acting as a Web server and an application server, and one server computer acting as a database server. The server computers must meet the following requirements:
Hardware requirements
- Front-end Web server and application server computers: a dual-processor computer with processor clock speeds of 2.5-gigahertz (GHz) or higher and a minimum of 2 gigabytes (GB) of RAM.
- Back-end database server: a dual-processor computer with processor clock speeds of 2.0 GHz or higher and a minimum of 2 GB of RAM.
Software requirements Web and Application Server
- Microsoft Windows Server 2003 (Standard, Enterprise, Datacenter, or Web Edition) with Service Pack 1 (SP1)
- Microsoft .Net Framework 2.0
- Microsoft .Net Framework 3.0
- The Web server and application server computers must be configured as Web servers running Microsoft Internet Information Services (IIS) in IIS 6.0 worker process isolation mode.
- Each of the computers must be using the NTFS file system. Windows Server 2003 includes a conversion utility (Convert.exe) that you can use to convert an existing file allocation table (FAT) volume to NTFS without losing data.
Back-End Database Server
- The back-end database server computer must be running Microsoft SQL Server 2005 or Microsoft SQL Server 2000 with Service Pack 3 (SP3) or later. It is assumed that you have installed and configured the database program on the back-end server computer. You do not need to set up or create specific databases for Office SharePoint Server 2007. The Office SharePoint Server 2007 Setup program will create the necessary databases when you install and configure Office SharePoint Server 2007.
In addition to these requirements, if you are using SQL Server 2005, you need to configure surface area settings. Use the following procedure to do this.
Configure surface area settings in SQL Server 2005
- Click Start, point to All Programs, point to Microsoft SQL Server 2005, point to Configuration Tools, and then click SQL Server Surface Area Configuration.
- In the SQL Server Surface Area Configuration dialog box, click Surface Area Configuration for Services and Connections.
- In the tree, open your instance of SQL Server, open Database Engine, and then click Remote Connections.
- Click Local and Remote Connections, click Using both TCP/IP and named pipes, and then click OK.
Security account requirements
To install Office SharePoint Server 2007 in a server farm environment, at-least 2 accounts are required:
- A user account that you can use to install Office SharePoint Server 2007 and run the SharePoint Products and Technologies Configuration Wizard. This account must be:
- A domain user account.
- A member of the Administrators group on each of your front-end servers.
- A member of the SQL Server Logins, which grants login access to your SQL Server instance.
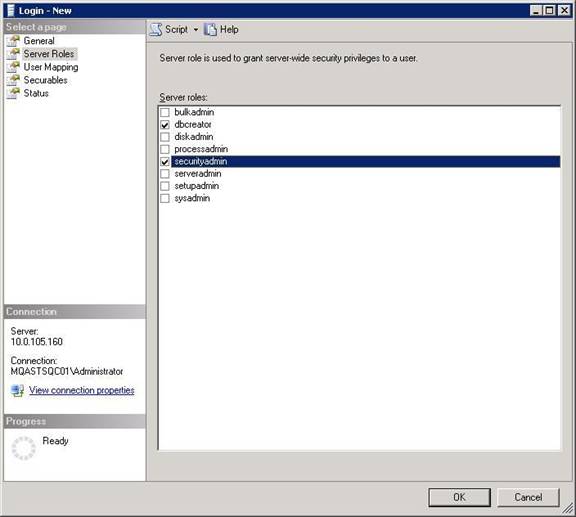
- A member of the SQL Server Database Creator server role, which grants permission to create and alter databases.
- A member of the SQL Server Security Administrators server role, which grants permission to manage server logins.
- A unique domain user account that you can specify as the Office SharePoint Server 2007 service account. This user account is used to access your SharePoint configuration database. It also acts as the application pool identity for the SharePoint Central Administration application pool and it is the account under which the Windows SharePoint Services Timer service runs. The SharePoint Products and Technologies Configuration Wizard adds this account to the SQL Server Logins, the SQL Server Database Creator server role, and the SQL Server Security Administrators server role. It is recommended that you follow the principle of least privilege and do not make this user account a member of any particular security group on your front-end servers or your back-end servers.
Configure the server as a Web server
Before you install and configure Office SharePoint Server 2007, you must install and configure the required software on each of your front-end servers. This includes installing and configuring IIS so your front-end servers act as Web servers, installing Windows .NET Framework 2.0, enabling ASP.NET 2.0, and installing Windows Workflow Foundation Runtime Components Beta 2.2 (build 3807.7).
Install and configure IIS
IIS is not installed or enabled by default in Windows Server 2003. To make your server a Web server, you must install and enable IIS, and you must make sure that IIS is running in IIS 6.0 worker process isolation mode.
- Click Start, point to All Programs, point to Administrative Tools, and then click Configure Your Server Wizard.
- On the Welcome to the Configure Your Server Wizard page, click Next.
- On the Preliminary Steps page, click Next.
- On the Server Role page, click Application server (IIS, ASP.NET), and then click Next.
- On the Application Server Options page, click Next.
- On the Summary of Selections page, click Next.
- Click Finish.
- Click Start, point to All Programs, point to Administrative Tools, and then click Internet Information Services (IIS) Manager.
- In the IIS Manager tree, click the plus sign ( ) next to the server name, and then right-click the Web Sites folder and select Properties.
- In the Web Sites Properties dialog box, click the Service tab.
- In the Isolation mode section, clear the Run WWW service in IIS 5.0 isolation mode check box, and then click OK.
Note: The Run WWW in IIS 5.0 isolation mode check box is only selected if you have upgraded to IIS 6.0 on Windows Server 2003 from IIS 5.0 on Microsoft Windows 2000. New installations of IIS 6.0 use IIS 6.0 worker process isolation mode by default.
Install Windows .NET Framework 2.0
- Run .Net Framework 2.0 Setup
Enable ASP.NET 2.0
- Click Start, point to All Programs, point to Administrative Tools, and then click Internet Information Services (IIS) Manager.
- In the IIS Manager tree, click the plus sign ( ) next to the server name, and then click the Web Service Extensions folder.
- In the details pane, click ASP.NET v2.0.50727, and then click Allow.
Install .Net Framework 3.0
1. Run .Net Framework 3.0 Setup
Install Microsoft Windows Workflow Foundation Runtime. Install and configure 2007 Office SharePoint Server
It is recommended that you install and configure Office SharePoint Server 2007 on all of your front-end servers before you configure Office SharePoint Server 2007 services and create sites. If you want to build a minimal server farm configuration, and incrementally add front-end servers to expand the farm, you can install and configure Office SharePoint Server 2007 on a single front-end server and configure the front-end server as both a Web server and an application server. Regardless how many front-end servers you have in your server farm, you must have SQL Server running on at least one back-end database server before you install Office SharePoint Server 2007 on your front-end servers.
Run 2007 Office SharePoint Server Setup
- Run Officeserver.exe, on one of your Web server computers.
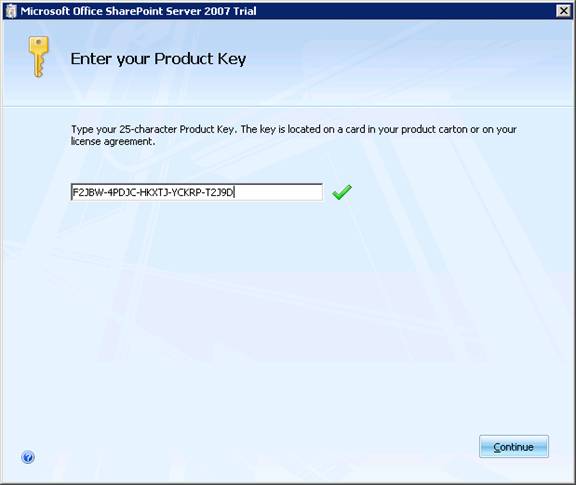
- On the Enter your Product Key page, enter your product key and click Continue.
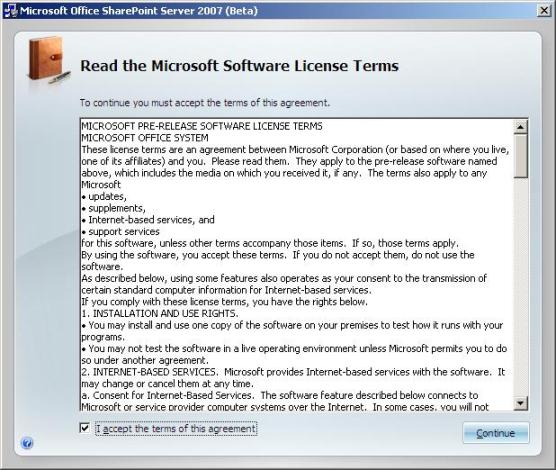
- On the Read the Microsoft Software License Terms page, review the terms, select the I accept the terms of this agreement check box, and then click Continue.
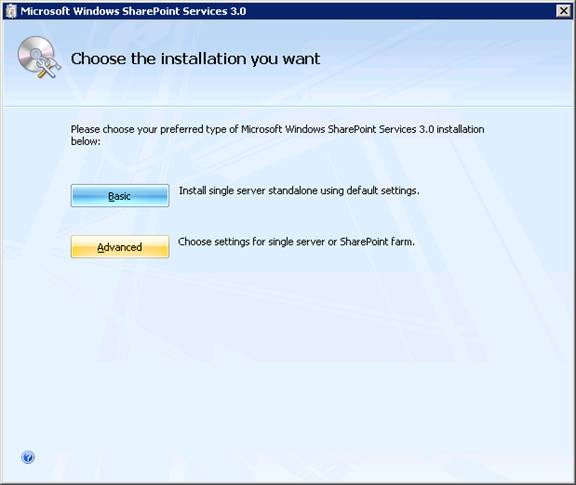
- On the Choose the installation you want page, click Advanced.
- On the Server Type tab, do one of the following:
If you are setting up a computer that will act as an application server, or a Web server and an application server, click Complete, and then click Install Now.
If you are setting up a computer that will act as a Web server only, click Web Front End, and then click Install Now.

- When Setup finishes, a dialog box appears telling you that you must complete the configuration of your server. Make sure that the Run the SharePoint Products and Technologies Configuration Wizard now check box is selected.
- Click Close to start the configuration wizard. Instructions for completing the wizard are provided in the next set of steps.
Run the SharePoint Products and Technologies Configuration Wizard
After Setup finishes, you can use the SharePoint Products and Technologies Configuration Wizard to configure Office SharePoint Server 2007. The SharePoint Products and Technologies Configuration Wizard automates several configuration tasks, including: installing and configuring the configuration database, installing Office SharePoint Server 2007 services, and installing SharePoint Central Administration. Use the following instructions to run the SharePoint Products and Technologies Configuration Wizard.
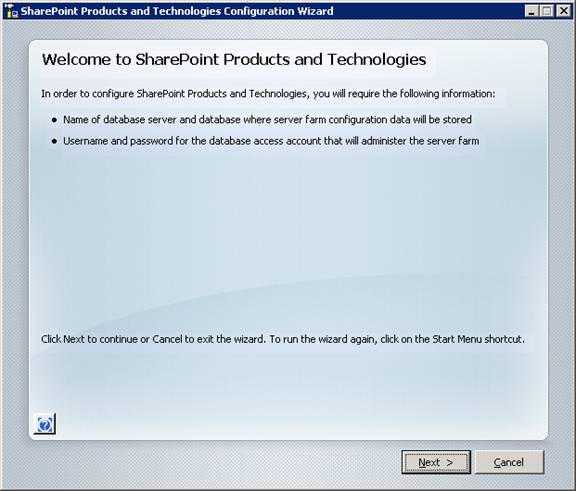
- On the Welcome to SharePoint Products and Technologies page, click Next.
- Click Yes in the warning dialog box that appears notifying you that some services might need to be restarted during configuration.
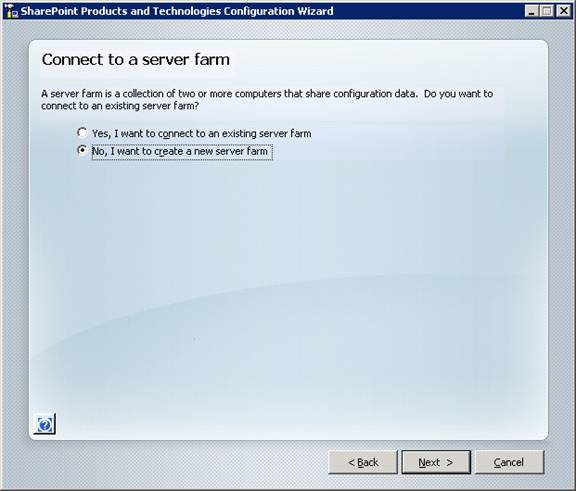
- On the Connect to a server farm page, do one of the following:
If this is the first front-end server that you are configuring in your server farm, click No, I want to create a new server farm, and then click Next.
If you have already configured your first server in your server farm, click Yes, I want to connect to an existing server farm, and then click Next.
- On the Specify Configuration Database Settings dialog box, in Database server, type the name of the computer that is running SQL Server.
- Do one of the following:
If this is the first server that you are configuring in your server farm, type a name for your configuration database in Database name, or use the default database name.
If you have already configured the first server in your server farm, click Retrieve Database Names, and in Database name click the database name that you created when you configured the first server in your server farm. The default name is SharePoint_Config.
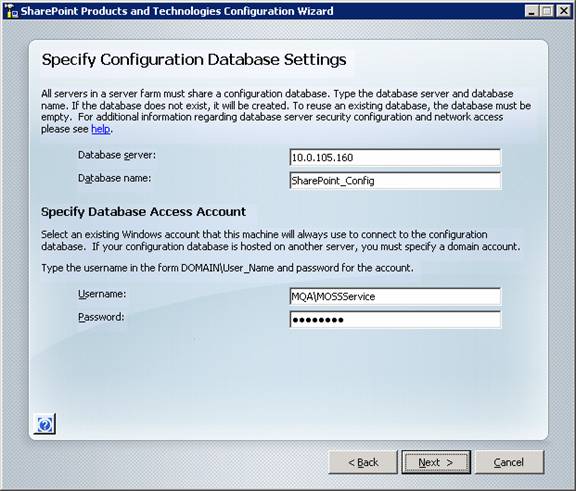
- In User name , type the user name of the account used to connect to the computer running SQL Server (be sure to type the user name in the format DOMAIN\username).
Important: This account is the Office SharePoint Server 2007 service account under which several Office SharePoint Server 2007 services run. The user account that you specify as the Office SharePoint Server 2007 service account must be a domain user account, but it does not need to be a member of any specific security group on your front-end servers or your back-end database servers. However, the user account that you specify must be a member of the following two SQL Server security roles on your back-end database servers: Database Creator and Security Administrator. It is recommended that you follow the principle of least privilege and specify a user account that is not a member of the Administrators group as your Office SharePoint Server 2007 service account.
- In Password, type the user's password, and click Next.
- Skip the next step if you have already configured first server in your server farm.
- On the Configure SharePoint Central Administration Web Application page, select the Specify port number check box and type a port number if you want the SharePoint Central Administration Web application to use a specific port, or leave the Specify port number check box unchecked if you do not care which port number the SharePoint Central Administration Web application uses.
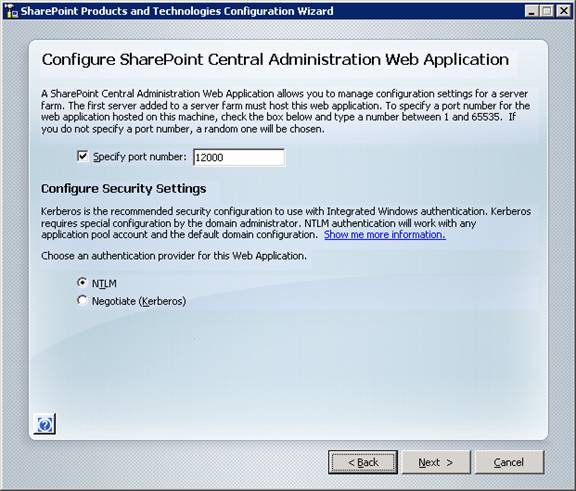
- On the Configure SharePoint Central Administration Web Application dialog box, select NTLM authentication (the default), click Next.
- On the Completing the SharePoint Products and Technologies Wizard page, click Next.
- On the Configuration Successful page, click Finish.
The SharePoint Central Administration Web page opens.
Notes
- If you are prompted for your user name and password, you might need to add the SharePoint Central Administration site to the list of trusted sites and configure user authentication settings in Internet Explorer. Instructions for configuring these settings are provided in the next set of steps.
- If you see a proxy server error message, you might need to configure your proxy server settings so that local addresses bypass the proxy server. Instructions for configuring this setting are provided later in this section.
Add the SharePoint Central Administration site to the list of trusted sites
- In Internet Explorer, on the Tools menu, click Internet Options.
- On the Security tab, in the Select a Web content zone to specify its security settings box, click Trusted Sites, and then click Sites.
- Clear the Require server verification (https:) for all sites in this zone check box.
- In the Add this Web site to the zone box, type the URL for the SharePoint Central Administration site, and then click Add.
- Select the Require server verification (https:) for all sites in this zone check box.
- Click Close to close the Trusted Sites dialog box.
- Click OK to close the Internet Options dialog box.
Configure user authentication settings for trusted sites
- In Internet Explorer, on the Tools menu, click Internet Options.
- On the Security tab, in the Select a Web content zone to specify its security settings box, click Trusted sites, and then click Custom Level.
- In the Settings list box, under User Authentication, click Automatic logon with current username and password.
- Click OK twice.
Note: If you do not want to add the SharePoint Central Administration site to the list of trusted sites, but you do not want to be prompted for your user name and password every time you access the SharePoint Central Administration site, you can instead add the SharePoint Central Administration site to the Local intranet zone. If you do this, you must enable the Automatic logon only in Intranet zone user authentication setting instead of the Automatic logon with current username and password user authentication setting
Configure 2007 Office SharePoint Server services
After you have installed and configured Office SharePoint Server 2007 on all of your front-end servers, you must configure Office SharePoint Server 2007 services. The services you need to configure depends on your server topology and the server roles you deploy. Use the following guidelines to determine which services you need to configure in your server farm.
- Search and indexing servers You must start and configure the Office SharePoint Server Search service on at least one of your front-end servers. This service provides search and indexing services. You can start and configure this service on any type of server, including a server that is acting as an application server and provides only Office SharePoint Server 2007 services, a server that is acting as both an application server and a Web server and provides both Office SharePoint Server 2007 services and Web services, or a server that is acting as a Web server and provides only Web services.
- Web servers The Web server role is implemented by IIS and the Windows SharePoint Services Web Application service. The Windows SharePoint Services Web Application service must be running on any server that acts as a Web server and renders Web content. This service is started by default on servers that you set up using the Web Front End option during Setup. If you set up a server using the Complete option during Setup, and you want that server to act as a Web server and render Web content, then you must start the Windows SharePoint Services Web Application service on that server.
In addition to configuring services on your front-end servers, you must create the Shared Services Provider (SSP). The SSP makes it possible to share the Office SharePoint Server 2007 services across your server farm. You must create the SSP before you can use it in a farm environment; Office SharePoint Server 2007 does not create the SSP by default in a farm environment.
The following procedures step you through the process of configuring Office SharePoint Server 2007 services, creating a Web application for the SSP, creating the SSP, and configuring indexing settings.
Start and configure the Search service
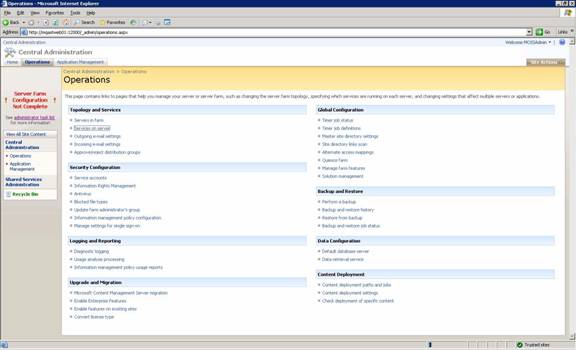
- On the SharePoint Central Administration home page, click the Operations tab on the top navigation bar.
- On the Operations page, in Topology and Services, click Servers in farm.
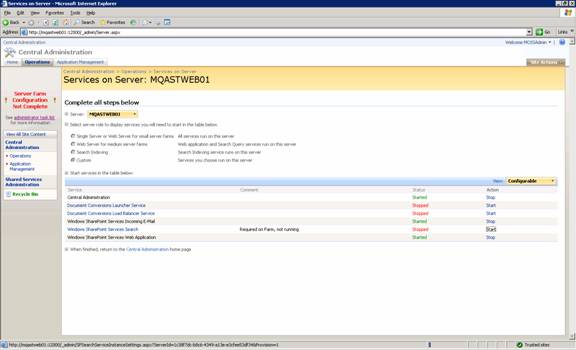
- On the Servers in Farm page, click the server on which you want to configure the search service.
- Click Start next to Office SharePoint Server Search.
- On the Office SharePoint Server Search Settings page, in the Query and Indexing section, make sure that the Use this server for indexing content and Use this server for serving search queries check boxes are selected.
- In the Default Catalog Location section, type a path to a physical folder to store the index files, or use the default location that is specified.
- In the Contact E-Mail Address section, specify a valid e-mail address.
- In the Service Account section, click Configurable, and in User name and Password, type the user name and password for the user account under which you want the Search service to run. The user account must be a member of the Administrators group on the computer that is running the Search service. If you want to use the principle of least privilege and select a unique user account that does not have administrative rights on your front-end servers or on your back-end database servers, see the Known Issues/Readme for Office SharePoint Server 2007 Beta 2. The user name must be in the format DOMAIN\username.
- In the Web Front End And Crawling section, do one of the following:
- If you are configuring the search service on a server that provides Web services and renders Web content, click No dedicated Web front-end computer for crawling
- If you are configuring the search service on a server that is a standalone search server that does not provide Web services and render Web content, click Use a dedicated web front end computer for crawling, and then, in Select a web front end computer, click the computer you want to use for crawling.
- Click Start.
Start the Windows SharePoint Services Web Application service
You must start the Windows SharePoint Services Web Application service on every computer that you want to act as a Web server and was set up using the Complete option during Setup. This service is started by default on servers that were set up using the Web Front End option. To enhance security, you can leave this service turned off on application servers that do not provide Web content to client computers. Also, you do not need to turn this service on to use SharePoint Central Administration on a server.
- On the SharePoint Central Administration home page, click the Operations tab on the top navigation bar.
- On the Operations page, in Topology and Services, click Servers in farm.
- On the Servers in Farm page, click the server on which you want to start the Windows SharePoint Services Web Application service.
- Click Start next to Window SharePoint Services Web Application.
Create the Shared Services Provider
- On the SharePoint Central Administration home page, click the Application Management tab on the top navigation bar.
- On the Application Management page, in the Office SharePoint Server Shared Services section, click Create or configure this farm's shared services.
- On the Manage this Farm's Shared Services page, click New SSP.
Important: If you have not created a Web application for the SSP administration site, you need to create one before you create the SSP. If you have already created a Web application for the SSP administration site, skip to step 14.
- On the New Shared Services Provider page, click Create a new Web application.
- On the Create New Web Application page, in the IIS Web Site section, click Create a new IIS web site, and do not modify the default settings in this section.
- In the Security Configuration section, under Authentication provider, select the appropriate option for your environment, and do not modify the default settings in the remainder of this section.
- In the Load Balanced URL section, do not modify the default settings.
- In the Application Pool section, click Create new application pool.
- In Application pool name, enter the name of your application pool or use the default name.
- Click Configurable, and in User name and Password, type the user name and password for the user account under which you want the application pool to run. The user account does not have to be a member of any particular security group. It is recommended that you use the principle of least privilege and select a unique user account that does not have administrative rights on your front-end servers or on your back-end database servers. You can use the user account that you specified as the Office SharePoint Server 2007 service account; however, if that user account is a member of a security group that has administrative rights on your front-end servers or your back-end database servers, you will not be following the principle of least privilege. The user name must be in the format DOMAIN\username.
- In the Database Name and Authentication section, verify the database information and make sure that Windows Authentication (recommended)is selected.
- In the Search Server section, do not modify the default settings.
- Click OK. Upon successful creation of the Web application, the New Shared Services Provider page appears.
- In the SSP Name section, in Web Application, select the Web application that you created for the SSP, and do not modify any of the default settings in this section.
- In the My Site Location section, do not modify any of the default settings.
- In the SSP Service Credentials section, in User name and Password, type the user name and password for the user account under which you want the SSP to run. The user account does not have to be a member of any particular security group. It is recommended that you use the principle of least privilege and select a unique user account that does not have administrative rights on your front-end servers or on your back-end database servers. You can use the user account that you specified as the Office SharePoint Server 2007 service account; however, if that user account is a member of a security group that has administrative rights on your front-end servers or your back-end database servers, you will not be following the principle of least privilege. The user name must be in the format DOMAIN\username.
- In the SSP Database section, you can either accept the default settings (recommended), or specify your own settings for the database server, the database name, or the SQL authentication credentials.
- In the Search Database section, you can either accept the default settings (recommended), or specify your own settings for the search database server, the database name, or the SQL Server authentication credentials.
- In the Index Server section, in Index Server, click the server on which you configured the Search service.
Note: If there is no index server listed in the Index Server section, then no server in your farm has been assigned the index server role. To assign the index server role to a server in your farm, follow the instructions in the "Configure the Search service" section earlier in this topic.
- In the SSL for Web Services section, click No.
- Click OK. Upon successful creation of the SSP, the Success page appears.
- On the Success page, click OK to return to the Manage this Farm's Core Services page.
Configure indexing settings
- On the SharePoint Central Administration home page, click the Application Management tab on the navigation bar.
- On the Application Management page, in the Office SharePoint Server Shared Services section, click Create or configure this farm's shared services.
- On the Manage this Farm's Shared Services page, click SharedServices1.
- On the Shared Services Administration page, in Search, click Search Settings.
- On the Configure Search Settings page, in the Crawl Settings section, click Default content access account.
- In the Default content access account section, in Account, Password, and Confirm Password, type the user name and password for the user account that you want to use to crawl content on your sites. This account must be a domain user account. It is recommended that you use the principle of least privilege and select a unique user account that cannot modify content and does not have administrative rights on your front-end servers or on your back-end database servers. You can use the user account that you specified as the Office SharePoint Server 2007 service account; however, if that user account is a member of a security group that has administrative rights on your front-end servers or your back-end database servers, you will not be following the principle of least privilege. The user account that you specify will be added to the Web application Full Read policy for your farm. The user name must be in the format DOMAIN\username.
- Click OK.
- In the Crawl Settings section, click Content sources.
- On the Manage Content Sources page, click Local Office SharePoint Server sites.
- On the Edit Content Source page, in the Crawl Schedules section, under Full Crawl, click Create schedule.
- In the Manage Schedules dialog box, configure schedule settings for full crawls of your content, and then click OK.
- In the Crawl Schedules section, under Incremental Crawl, click Create schedule.
- In the Manage Schedules dialog box, configure schedule settings for incremental crawls of your content, and then click OK.
- In the Start Full Crawl section, select the Start full crawl of this content source check box, and then click OK.
Create and configure a site
After you configure services in your server farm, you can create a Web application and a site collection. You should create the Web application on the first server on which you installed Office SharePoint Server 2007 (in other words, the same server that is running the SharePoint Central Administration service).
Create a Web application for your SharePoint site
On the SharePoint Central Administration home page, click the Application Management tab on the top navigation bar.
- In the SharePoint Web Application Management section, click Create or extend Web application.
- On the Create or Extend Web Application page, click Create a new Web Application.
- On the Create New Web Application page, in the IIS Web Site section, click Create a new IIS web site, and change the port setting to port 80. This will allow you to access your site by typing http://ServerName. If you use a nonstandard port number you will have to include the port number in the URL to access your site (for example, http://ServerName:port).
- In the Security Configuration section, under Authentication provider, select the appropriate option for your environment, and do not modify any other settings in this section.
Note: By default, the authentication provider is set to NTLM.
- In the Load Balanced URL section, do not modify the default settings.
- In the Application Pool section, select Create new application pool, and use the default settings for the application pool name.
- Click Configurable, and in User name and Password, type the user name and password for the user account under which you want the application pool to run. The user account does not have to be a member of any particular security group. It is recommended that you use the principle of least privilege and select a unique user account that does not have administrative rights on your front-end servers or on your back-end database servers. You can use the user account that you specified as the Office SharePoint Server 2007 service account; however, if that user account is a member of a security group that has administrative rights on your front-end servers or your back-end database servers, you will not be following the principle of least privilege. The user name must be in the format DOMAIN\username.
- In the Database Name and Authentication section, verify the database information and ensure Windows Authentication (recommended)is selected.
- In the Search Server section, do not modify the default settings.
- Click OK.
- On the Application Created page, which appears after successful creation of the Web application, click Create a new Windows SharePoint Services site collection.
Create the site collection for your Web application
- On the Create Site Collection page, in the Title and Description section, in Title, enter a title for the new site.
- In Description, enter a description of the site collection.
- In the Web Site Address section, click Create site at this URL, and in URL path click (root).
It is most common to create a site collection at the root; however, you can create a site collection at a specific URL path.
- In the Primary Site Collection Administrator section, in User name, type the user name of the site collection administrator. This can be the same user account that you specified as the Office SharePoint Server 2007 service account, but you should follow the principle of least privilege and use a user account that does not have administrative privileges or rights on your front-end or back-end servers.
- In the Quota Template section, select a predefined quota template to limit resources used for this site collection.
Note: You can also select No Quota, thereby allowing this site collection to use any available resources.
- In the Template Selection section, click the Publishing tab, and then click Corporate Intranet Site.
- Click OK to create the site collection with the attributes you specified. Upon successful completion, a Top-Level Site Successfully Created page appears.
- Click OK to return to the SharePoint Central Administration home page, or click the http://ComputerName link to go to your new SharePoint site home page.
After you install and configure Office SharePoint Server 2007
After you finish creating your first site, you can start adding content to the site and you can start customizing the site. However, it is recommended that you first configure several administrative settings to ensure that your Office SharePoint Server 2007 environment is operating properly and you are using all of the features and capabilities provided by Office SharePoint Server 2007.
Install and configure Excel Calculation Services
To take full advantage of the business intelligence capabilities of Office SharePoint Server 2007 you need to start and configure Excel Calculation Services. Instructions for doing this are provided below.
Note: Excel Services is only available if you use a product key that activates the Enterprise version of Office SharePoint Server 2007.
Start and configure Excel Calculation Services
- On the SharePoint Central Administration home page, click Administrative Tasks.
- On the Administrative Tasks page, click Add Excel Services Trusted Locations.
- On the Add Excel Services Trusted Locations page, in Action, click Add Excel Services Trusted Locations.
- On the Excel Services Trusted File Locations page, click Add Trusted File Location.
- In the Location section, in Address, type the address of the trusted file location. It is recommended that the trusted file location be an Office SharePoint Server 2007 site, but you can also specify universal naming convention (UNC) paths or HTTP Web sites.
- In Location Type, click Windows SharePoint Services if you specified an Office SharePoint Server 2007 site, click UNC if you specified a UNC path, or click HTTP if you specified an HTTP Web site.
- In the External Data section, in Allow External Data, select the trust level for external data sources that you want to enable by doing one of the following:
- Click None to prevent Excel Calculation Services from processing connections to any external data connection.
- Click Trusted data connection libraries only to prevent Excel Calculation Services from processing connections to external data sources that are embedded within workbooks. This setting permits Excel Calculation Services to process links to trusted data connection libraries.
- Click Trusted data connection libraries and embedded to permit Excel Calculation Services to process direct connections to external data sources that are embedded within workbooks. This setting also permits Excel Calculation Services to process links to trusted data connection libraries.
Configure alternate access mappings for your Web applications
If you installed and configured Office SharePoint Server 2007 on a single front-end server, and a user browses to your server, the server will render the content that is in your Web application. However, if you added subsequent front-end servers to your server farm, the newly-added servers will not have alternate access mappings configured to your Web application. To map newly-added front-end servers to your existing Web application, you need to configure alternate access mappings.
Before you configure alternate access mappings, install and configure Office SharePoint Server 2007 on all of the front-end servers that you want to add to your server farm, and make sure that the servers are joined to your server farm. See "Run Windows SharePoint Services Setup" and "Run the SharePoint Products and Technologies Configuration Wizard" for information about installing and configuring Office SharePoint Server 2007.
To configure alternate access mappings
- On the SharePoint Central Administration home page, click the Operations tab.
- On the Operations page, in the Global Configuration section, click Alternate access mappings.
- In Alternate Access Mapping Collection, click Change Alternate Access Mapping Collection.
- In the Select an Alternate Access Mapping Collection dialog box, click the Web application that you want to modify. If you have created only one Web application, and you specified port 80 for the Web application, the Web application should be listed as SharePoint (80).
- Click Edit Outbound URLs, and verify that your Web application is listed in the Default zone for outbound URLs. The outbound URL is the URL that you want users to use to access your Web application.
Note: If you have a load-balanced configuration with a host name, add the host name to the Outbound URL for the Default zone.
- Click Save.
- Click Add Incoming URLs.
- On the Add Incoming URLs page, in New default zone URL protocol, host and port type the URL for the server that you want to map to your Web application. Typically, this is http://servername:portnumber.
Note: If you have a load-balanced configuration, you should add the server name of each of your front-end Web servers to the list of internal URLs. This will allow each of your Web servers to reach the content in your common Web application. Also, make sure the zone you selected for the incoming URL matches the zone of the outbound URL for the load balancer. You can have multiple incoming URLs associated with a single outbound URL.
- In Zone, make sure that Default is selected.
- Click Save.
Configure additional administrative settings
After you have deployed the SharePoint Server, there are some other additional settings which you need to configure. You should perform these tasks to take full advantage of the SharePoint 2007 administrative Features:
Configuring server for incoming emails will enable you to get advantage of the following SPS 2007 features:
1. SharePoint sites can accept and archive incoming e-mail.
2. SharePoint sites can archive e-mail discussions as they happen, save e-mailed documents, and show e-mailed meetings on site calendars.
3. In addition, configure the SharePoint Directory Management Service for e-mail distribution list creation and management.
Configure Outgoing SMTP Email server to enable SPS 2007 for sending Notifications and alerts to the site users and administrators. You can configure “From” and “Reply to” email addresses for outgoing emails.
- Create SharePoint sites: Create more SharePoint sites and Web applications if your site design requires multiple sites or multiple Web applications.
- Diagnostic logging settingsTo get yourself helped in troubleshooting, configure various logging and diagnostics settings including trace logs, event messages, user-mode error messages, and Customer Experience Improvement Program events.
- Configure antivirus protection settingsConfigure Antivirus Settings for Server to enable the virus scanning for document upload and downloads, also configure virus scanning timeout and execution threads on the server for antivirus. A SharePoint Server 2007 compatible Antivirus program is required for this.
- You can use the following procedure to configure optional administrative settings using SharePoint Central Administration.
Configure administrative settings using SharePoint Central Administration
- Click Start, point to All Programs, point to Administrative Tools, and then click SharePoint 3.0 Central Administration.
- On the SharePoint Central Administration home page, under Administrative Tasks, click the administrative task you want to perform.
- On the Administrative Tasks page, next to Action, click the task.
|
|