This demonstration illustrates the use of Dynamic Forms 2.7 as a purchase form using PayPal Integration. You can see the advanced functionality within Dynamic Forms to calculate totals and to pass specific transaction details to PayPal. It also presents a variety of completion events that are designed to fire upon receipt of specific PayPal notices.
This demonstration also includes a few optional features such as an Advanced CAPTCHA field. Enhancements such as the Drag & Drop functionality and the Recycle Bin are also presented here. In addition, you will experience the feature that enables the enter key to submit the form. No need to grab the mouse to click submit!
Background:
PayPal is a leading payment processing option that has gained tremendous popularity over the internet marketplace. Dynamic Forms with PayPal Integration allows customers to offer their users more flexibility in the way they pay for their transactions. To find out more about PayPal, please visit http://www.paypal.com.
A term that is often used here is Instant Payment Notification (IPN). This is the definition obtained from PayPal’s website:
Instant Payment Notification (IPN) is PayPal's interface for handling real-time purchase confirmation and server-to-server communications. IPN delivers immediate notification and confirmation of PayPal payments you receive and provides status and additional data on pending, cancelled, or failed transactions.
In all demonstrations related to PayPal integration, the focus would be in 3 general areas:
1. The parameters used to pass transaction details to PayPal.
2. The creation of completion events that are tied to different IPN’s.
3. Highlights on new features available in Dynamic Forms 2.7.
You will need to have a PayPal seller account to process payments this way. We recommend obtaining a PayPal Sandbox account while you are in test mode.
Setting Payment Gateway to PayPal
1. Go to Module Configuration, Payment Gateway. Set Enable Payment Gateway to Yes and select PayPal as the gateway.
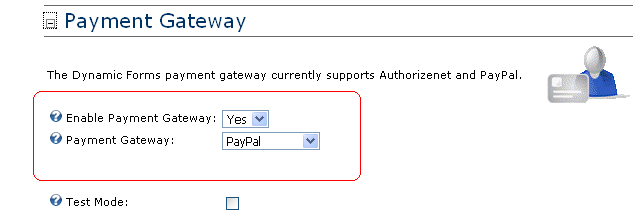
2. Further down, click on PayPal Gateway and observe the following:

Key Pointers:
a. Enter the email you set for your PayPal seller account.
b. Select Purchase as the PayPal Payment Type.
c. PayPal URL is either Sandbox.Paypal.com (test) or PayPal.com (production).
Setting Parameters
Parameters are the way we pass transaction details to PayPal. It is advisable that you review the description of various PayPal variables (also referred to as tokens). For now, go to Module Configuration, PayPal Gateway and find this section.

In this demonstration, we used Data Springs Modules as the general description for the variable &item_name. This was done because multiple items may be ordered in this scenario. If the form only asked for a single selection, we could have used &item_name=$(Products_Text) for a more specific description displayed on the Paypal Page.
To indicate US Dollars, we used the parameter ¤cy_code=USD. Please check with PayPal for codes referring to other currencies.
For this demonstration, we set a custom client-side javascript statement in the Products field to calculate $(YourTotal). Normally, you would use something like &amount=$(YourTotal), where 'YourTotal' is the short field name of the total field. However, notice that the variable &amount is set to a value of 1.00 in order to control the value of all ‘test’ transactions in this demonstration.
Please note that there are a number of ways to obtain your totals aside from setting a fixed value like we did here or using a client-side event to get the value for $(YourTotal). Other possibilities are:
Allow users to enter the total amount.
Question Events: Use the property to ‘Set default value of another field based on the response of a field.”
Use the $(Calc_Total) parameter in the Payment Gateway (not PayPal Gateway) to total fields.
Use the tokens to define parameters as shown in the example. Absolutely no spaces are allowed with the parameters. Even one space will cause your PayPal link to error out.
Completion Events
Four completion events were created for this demo. After a completion event is created, it needs to be ‘tied’ to a PayPal IPN. In this manner, an IPN received will trigger the completion event to fire. Go to Module Configuration, Payment Gateway to view this section.
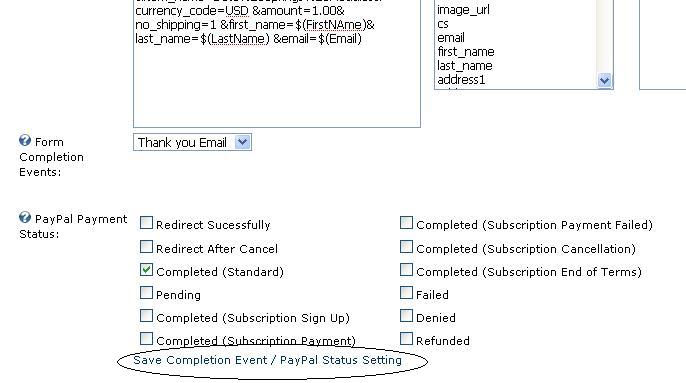
Notice that the event, 'Thank you Email,' is tied to 'Completed (Standard) in the PayPal Gateway. This means that the email will go out only after PayPal sends the Completed IPN.
The payment status called 'Redirect Successfully' is tied to the event Success Redirect. This page redirection event will fire when a user clicks on 'Return to Merchant.' from the PayPal page after the transaction. In this example, it is set to go back to this page. You may choose to redirect to a different page that contains a 'Thank you.' message.
Cancel Redirect will will fire when a user clicks on 'Cancel' during order processing. In this example, it is set to go back to this page. Again, you may choose to create a page to alert users that the order was not completed. This event is tied to 'Redirect after Cancel.’
Lastly, an email event called ‘Pending Email’ is tied to Pending and is intended to notify customers of their order status should there be any delay. If your customer used an e-check the process may take several days to complete.
Remember to click Save Completion Event / PayPal Status Setting each time you link an event to an IPN.
Feature Highlights
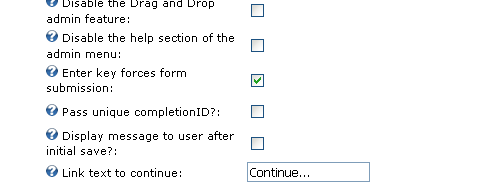
The new feature, ‘Enter key forces submission’ is demonstrated in the form. Check the setting in Module Configuration, General Settings.
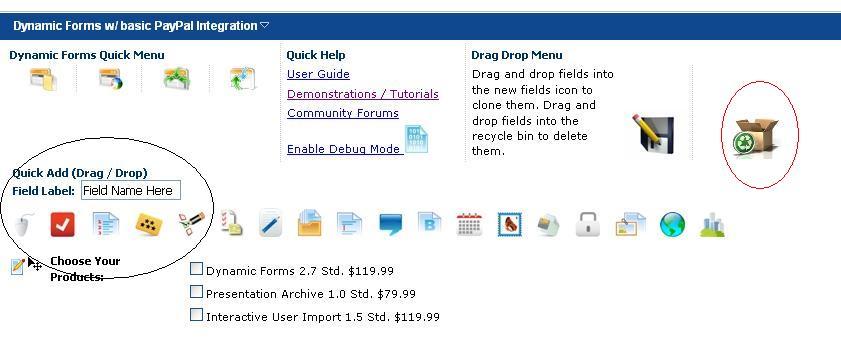
The ‘drag and drop’ feature provides much improved ease-of-use in managing questions. In the image below, notice how you can enter your new field name. You can then select what field type you want this to be: a text field, a checkbox, radio buttons, etc. Hold down the field type icon and drag it to where you want to position the question. It's that easy! You may also use drag and drop to change your question sort order or even to move the question to the recycle bin!
The recycle bin also comes with extended functionality. Now, when you delete a question by putting it in the recycle bin, you may access this ‘deleted’ question in the future and restore it without having to create the question again from scratch.
Another important enhancement is in the module menu under Advanced Features. It is called the Advanced Field Wizard and is designed to allow administrators to apply a setting to several fields in one step! This feature is discussed more in Demonstration # 16.
Notice the Captcha field? This is set with the new Advanced DataSprings Captcha Field which allows for 'Enable Captcha Refresh' and for 'Enable Captcha Sound.' The Advanced Captcha requires additional one-time setup within your portal. Instructions are available here. Want to see the Captcha settings in Manage Questions? Click here.
|
 Would you like to setup your form just as this demonstration is setup? If so simply download this template and copy it to your DNN Portals Home Directory to use the IPORTABLE feature of the module (Select Import Content from the module menu and import the template): Would you like to setup your form just as this demonstration is setup? If so simply download this template and copy it to your DNN Portals Home Directory to use the IPORTABLE feature of the module (Select Import Content from the module menu and import the template):
Download Demonstration XML Export - Import into your module
|