DotNetNuke 6.1 Review and Installation
DotNetNuke or DNN is a content management system based on Microsoft's .Net Technology that allows non-technical users to create, modify and customize the appearance and working of their websites. DotNetNuke lovers must have realized the release of DotNetNuke 6.1. In this article we will discuss the new features that came along with DNN 6.1. Later we will walk you through to a detailed step-by-step process to how to download and install DotNetNuke 6.1.
What’s new in DotNetNuke 6.1
Tendency of using mobiles and tablets to access information has increased dramatically in last couple of year. Making and running a websites is no longer enough unless you have an equally optimized mobile version that can support number of gadgets present in the market. DotNetNuke 6.1 is here to power-up your remote needs and manage your content. Along with other improvements DNN 6.1 has major enhancement that make easier for you to track how your content was accessed.
Client Capability API:
The DNN 6.1 comes with a Client Capability API, with just few lines of code you can find out how your data was delivered on a mobile device or a tablet. This doesn't end here Client API capability will also give you the specifications of visitor's device to make it easier for you to analyze the performance of your portal against a specific device.
Site Redirection:
DotNetNuke Professional and Enterprise Edition consist of two additional modules to manage more than one site redirection based on the rules and target devices. The ability to manage site redirection will definitely give you a competitive edge when it comes to design your mobile strategy.
Mobile Template and Skin:
DotNetNuke Professional and Enterprise packages include a mobile template and skin to start with. This can be helpful for those who never tried to optimize their websites for mobile use.
Site Group:
Multiple sites under one parent site is a commonly used tactic these days, especially in big organizations. DotNetNuke Professional and Enterprise edition allow organizations to share user authentication and profile information across multiple sites within the group.
Client Resource Management:
DotNetNuke previously announced that they have several goals for improving page rendering, but their first objective was to reduce the total number of http requests. This is something that they have done in DotNetNuke 6.1 which only requests 7 JavaScript files and 2 CSS files for anonymous users.
Overall DotNetNuke 6.1 seems to be a promising version emphasizing on managing content on mobile devices. But at the same time it is disappointing that many important features of DNN 6.1 are only available in Professional and Enterprise edition, there is not much for Community edition.
Installing DotNetNuke 6.1
With that done we will now move forward to go through a detailed step-by-step process to download and install DotNetNuke 6.1. Installation of DNN 6.1 is almost similar as that of DNN 6.0.
Specifications:
Before starting we should be well aware of the installation requirements.
- DotNetNuke 6.1 requires Microsoft SQL Server 2005/2008 or SQL Express
- Microsoft IIS (Internet Information Services) 5+, IIS 7 or 7.5 are recommended
- Microsoft .NET 3.5 SP1 ( can be obtained via Windows Update)
Downloading the Package:
DotNetNuke 6.1 package can be downloaded from
http://www.codeplex.com/. Here is a
link that will navigate you directly to the installation package.
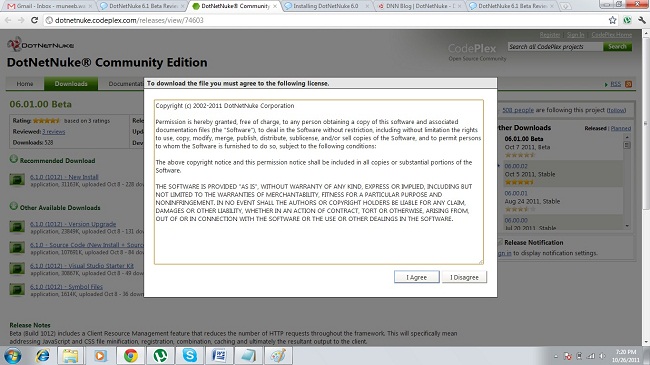
Extract the contents of the ZIP archive to any local folder. Make sure to uncheck the "block option" under properties, sometime this option comes as "checked" when zip files are downloaded.
Installation process:
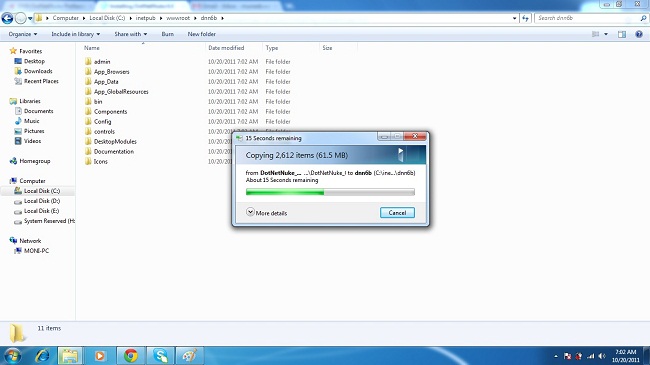
To begin the installation processes create a create a directory in c:\inetpub\wwwroot\ called "dnn6b" which would look like this c:\inetpub\wwwroot\dnn6b\. Now copy the extracted files to c:\inetpub\wwwroot\dnn6b\ to this folder.
Setting up IIS:
In this step you have to setup a web service and that’s where Internet Information Services (IIS) will come into play. To access IIS go to Start Menu>>Control Panel>>Administrative Tools and double click Internet Information Service (IIS) Manager, if you are installing DNN for the first time then you might have to first install ISS from Window’s Programs and Features section in control panel . Now look for "Default Web Site"; you will find this on expanding your "web server" and "sites" nodes in the left column, as shown in the screenshot below.
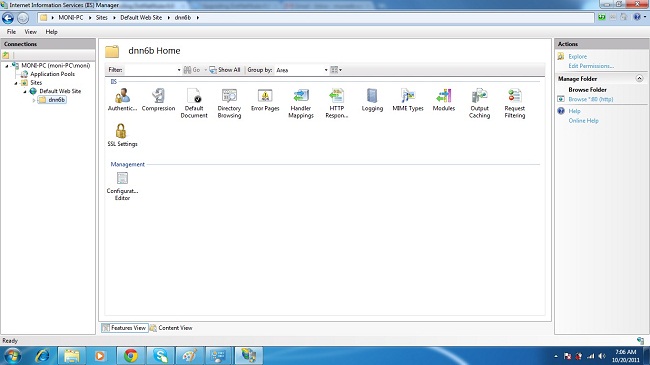
Under "Default Web Site" you will find the folder "dnn6b"- the folder where the extracted files were copied. Right click the folder "dnn6b" and click the option "convert to application" and press "OK", you need not to change anything in the dialog box.
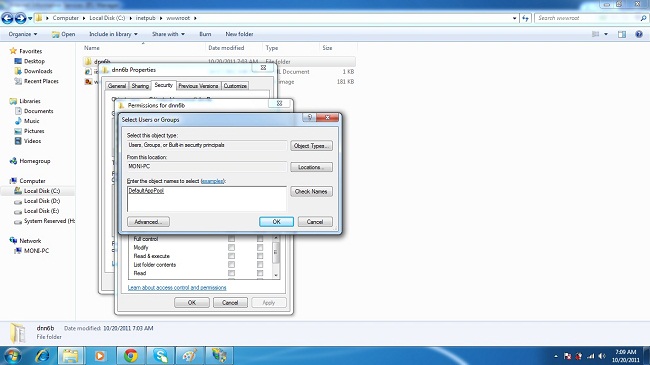
Setting up permissions:
Allow the user who will run the website to have a full control on the website. To setup the permissions go back to the wwwroot directory and right click the folder "dnn6b" and go to properties. Navigate to "Security" tab and click "edit" to change permissions. Under the dialog box for permissions click "Add", type "IIS AppPool\defaultAppPool" as user, click "Check Names" and press OK. Check the "full control" option under the permissions box for "defaultAppPool".
Creating Database:
Here we will create a new database for which SQL 2008 Management Studio is installed in our machine.
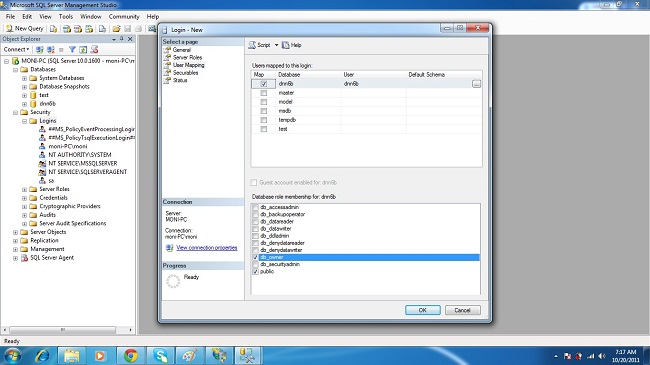
Expand the Database node in the left column of SQL Studio to create a new database. To keep it simple give database same name as that of the site, i.e. "dnn6b". Also, you have to create a user that who will be the database owner. To setup the user expand the "Security" node and right click the "login" node and select "New Login", security node can be found just below the database node. Don’t forget to check the option “db_owner” for the login you will create.
Running the Installation wizard:
Let's go back to the internet browser and type https://localhost/dnn6b, this address will take you to the graphical interface of the installation process.
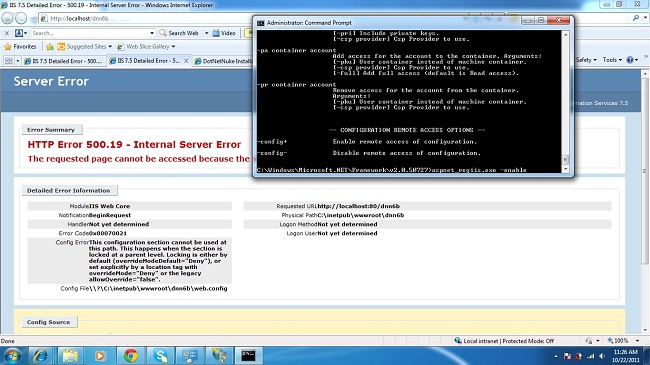
On a related note we have observed that sometime a user face an “HTTP Error 500.19 - Internal Server Error” when trying to run the wizard for the first time. This has happened to us while installing DotNetNuke 6.0 and now it again gave us the same error while trying running the installation wizard for DotNetNuke 6.1. There are number of forum posts relating to the error and seems like this has become really frustrating for some users. Let us give you a simple solution to make you running smoothly with your DNN installation.
Just for clarity below is the exact text of the error you might face:
|
HTTP Error 500.19 - Internal Server Error
The requested page cannot be accessed because the related configuration data for the page is invalid.
|
|
Detailed Error Information:
Module IIS Web Core
Notification BeginRequest
Handler Not yet determined
Error Code 0x80070021
Config Error This configuration section cannot be used at this path. This happens when the section is locked at a parent level. Locking is either by default (overrideModeDefault="Deny"), or set explicitly by a location tag with overrideMode="Deny" or the legacy allowOverride="false".
Config File \\?\C:\inetpub\wwwroot\dnn6b\web.config
Requested URL http://localhost:80/dnn6b/
Physical Path C:\inetpub\wwwroot\dnn6b\
Logon Method Not yet determined
Logon User Not yet determined
|
|
Config Source:
79: </modules>
80: <handlers>
81: <remove name="WebServiceHandlerFactory-Integrated"/>
|
Error Resolution:
Make sure IIS are configured with ASP.NET and has required "handlers" and other relevant configurations to successfully run DotNetNuke as an ASP.NET website. Otherwise you can face errors like "HTTP Error 500".
To configure IIS with ASP.NET, you need to run "aspnet_regiis" tool, which is normally found at C:\Windows\Microsoft.NET\Framework\v2.0.50727 (change the version according to your installation, if necessary).
Running asp.net_regiis tool:
-
Open Command Prompt as "Adminstrator".
-
Type in cd C:\Windows\Microsoft.NET\Framework\v2.0.50727
-
enter aspnet_regiis.exe -i –enable
Wait for the process to finish and you're done, for more information on aspnet_regiis tool follow here.
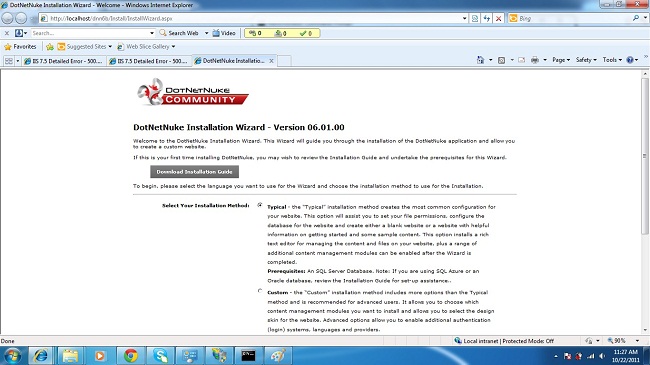
Now you will be able to see the installation wizard. Keep the installation method as "Typical" and press Next, you should see a message in green words stating "you site has passed permission checks" now press Next again. You can select custom installation if you want to make specific changes according to your requirements.
This will take you to the configuration of database connections; select your database type and give your database name. Do not select the integrated security because you have already created a user for your database. Run the wizard as "db_owner”.
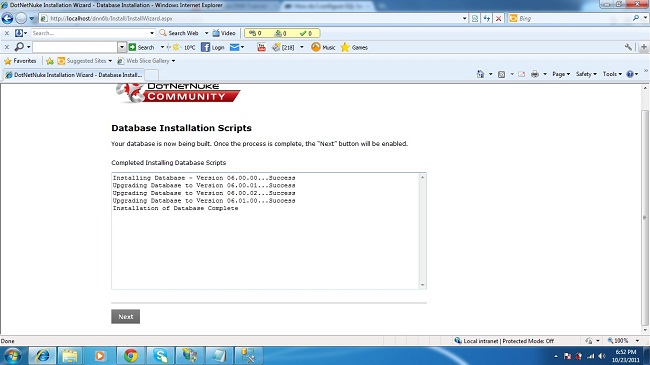
Press Next button wait for few second at your screen to see the success message: Installation of the Database Complete.
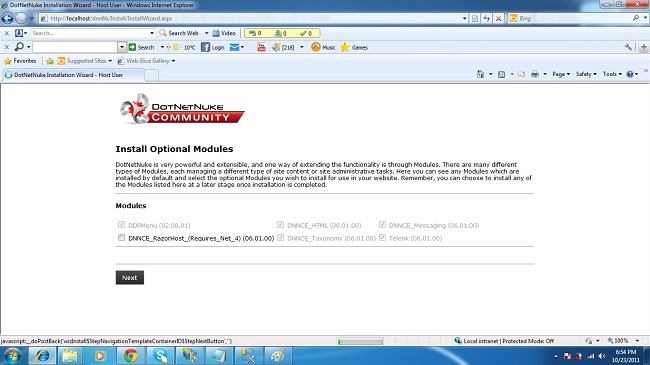
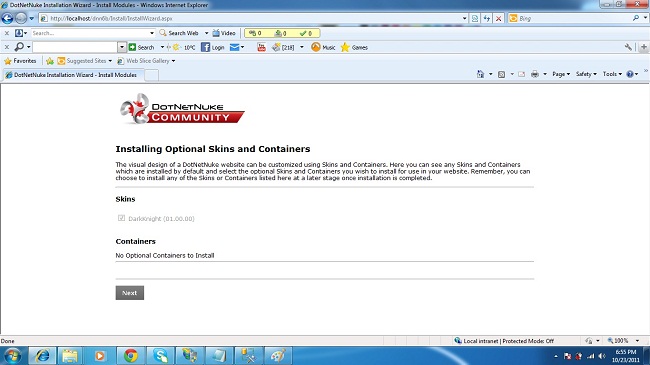
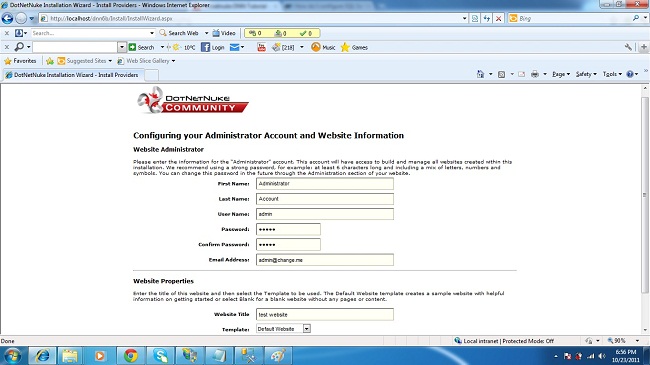
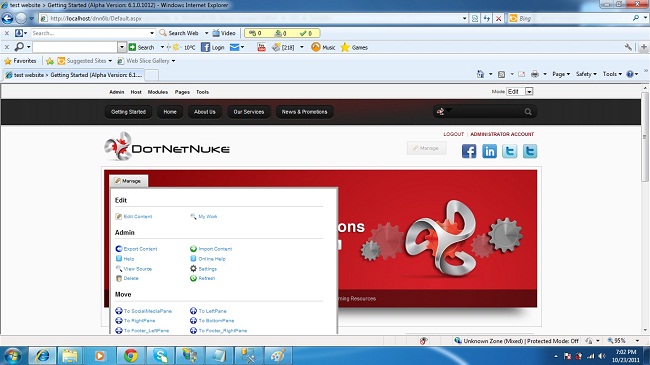
In the new DotNetNuke 6.1 you can install optional modules and skins just after the completion of installation; this is good user-friendly feature especially for new users. Next configure your account and enjoy your website.
Please keep in mind that this is a release and is not recommended for production use.