Upgrading DotNetNuke 4.9.5 to DotNetNuke 6.0
DotNetNuke is a content management based on Microsoft's .Net Technology that allow non-technical users to create, modify and customize the appearance and working of their websites. DotNetNuke Corp recently released
DotNetNuke 6 that allows much more simplified user interface and increases productivity by making it much easier for the user to build and maintain websites.
In this tutorial we will walk you through a detailed step-by-step process to how to download and upgrade existing DotNetNuke 4.9.5 to the latest version, DotNetNuke 6.0.
Before formally starting the process let us make this very clear that it is possible for the user to directly upgrade DotNetNuke 4.9.5 to DotNetNuke 6.0. Most of the tutorials published over the internet would suggest that it is either not possible or requires to install number of enhancement packages to directly upgrade DotNetNuke 6, which is fortunately not the case. Many would suggest to go step-by-step from DotNetNuke 4.9.5 to 5.5 and then to DotNetNuke 6.0. Here we will show with the help of screenshots that if you have IIS configured properly and have all matching specifications then there is no issue in upgrading DotNetNuke 4.9.5 to DotNetNuke 6.0 using the platform of Windows 7.
Specifications:
In this tutorial we are assuming that:
- Users have Microsoft SQL Server 2005/2008 or SQL Express.
- Currently using DotNetNuke 4.9.5 on Windows 7. It should be noted that DotNetNuke 4.9.5 is perfectly workable on Windows 7.
- Microsoft IIS (Internet Information Services) 5+, IIS 7 are recommended.
- Microsoft .NET 3.5 SP1 ( can be obtained via Windows Update).
Before starting the upgrade process you must, as always, first create a backup of the website and the database. Never ever try to upgrade DotNetNuke on live site without creating the backup. There are number of ways that can be used to create backup for your website. We will elaborate few most common and easy methods to create backups.
Database backup:
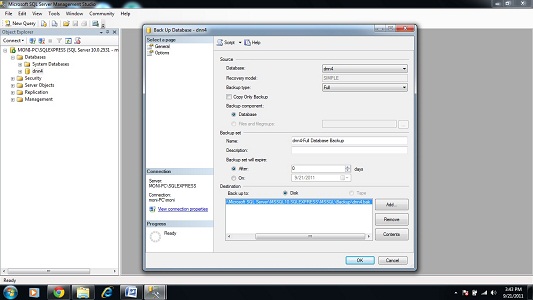
As you can see in the screen shot that we are using Microsoft SQL Server Management Studio 2008. To have a backup of your existing database navigate to your specific database in Enterprise Manager, right click on the database and select "All Tasks" >> “Backup" and save the “.bak” file at a secure location.
 SQL Backup to app_data:
One common method is to copy the database backup in app_data folder with ".resources" extension. The will enable you to copy the compete website including database as a single unit (zip file).
Taking your site offline:
If your site is online and have regular visitors then it is better to leave a message that will let the visitors know of any back end enhancements. All you have to do is to place "app_offline.htm" in the root directory. ASP.NET will itself display the visitor a friendly message that the website is currently under maintenance or you can edit the file to left a message that suits you. Once the upgrade is complete you can simply rename the file "app_offline.htm" to "app_offline.htm.exclude" or can even delete the file.
Upgrading DotNetNuke 4.9.5:
The backup has been created and we are all set to move forward with the upgrade process.
Downloading the upgrade package:
DotNetNuke 6 upgrade package can be downloaded from
http://www.codeplex.com/. All we need is to visit the website, search with the keyword "DotNetNuke 6" and the top most result would be the one we should be looking at. Navigate to the download tab at the top of the page and make sure that you download the latest version upgrade. For your ease here is a
link that will navigate you directly to the upgrade page.
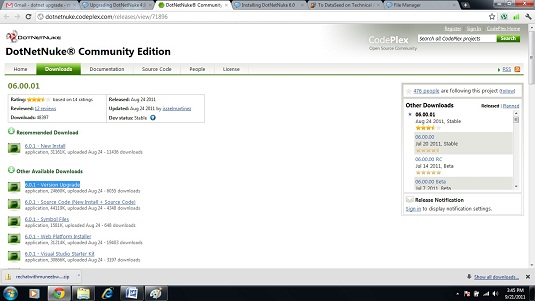
Once the upgrade package has been downloaded, the next step is to extract the contents of the ZIP archive to any local folder. Make sure to uncheck the "block option" under properties, sometime this option comes as "checked" when zip files are downloaded.
Upgrade to DotNetNuke 6:
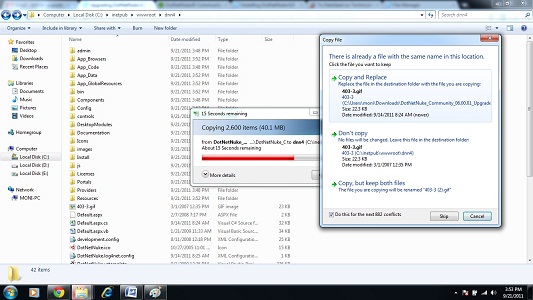
To begin the upgrade processes we will navigate to our local root directory where the files of DotNetNuke 4.9.5 exist, “c:\inetpub\wwwroot\”, which would look like this c:\inetpub\wwwroot\dnn4\. Now we will copy all the files from the upgrade package that we have just downloaded and replace them in the directory where DotNetNuke 4.9.5 was installed “c:\inetpub\wwwroot\dnn4\”.
 Running the upgrade wizard:
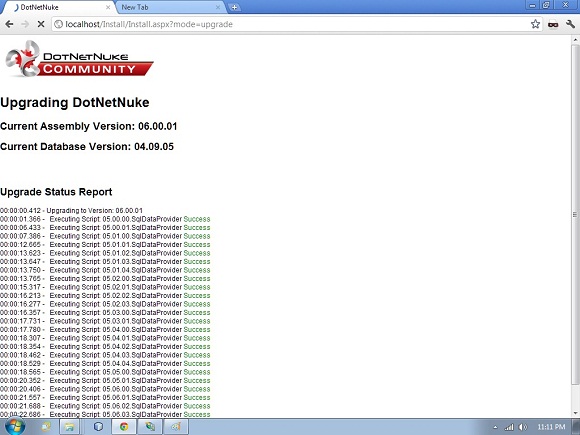
Once the files are replaced we are going to recall the website in the web browser or simply strike this link “
localhost/Install/Install.aspx?mode=upgrade” into your web browser.

You will realize, as can be seen in the snapshot, that the upgrade process has been triggered itself. You don’t need to do anything but to wait for few minutes until a message at the bottom shows the status as “Upgrade Complete”.
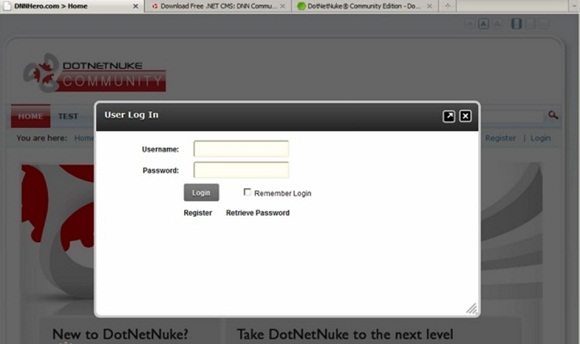
Click at the bottom to access you portal, enter your credentials and you are good to go.

Dotnetnuke has now made it easier for the users to upgrade from one version to another without facing much issue. But there might be some permission problems during the upgrade process. To overcome such scenarios make sure that you have set all the required permissions to give user full control on the website. Navigate to "Security" tab of your DNN folder under “wwwroot” directory to confirm that you have all the required permissions fully configured.