Introduction to Windows Phone 7:
Windows phone 7 is the new step by Microsoft in the world of mobile operating systems. Microsoft has been in this market with its Windows Mobile platform which was aimed at the Enterprise market and wasn’t that much famous. With operating systems like iOS and Android targeting every day smart phone users, capturing about more then 60% of the smart phone industry and continuously expanding, Microsoft decided to have a kick back and dive in with full momentum in the market again by launching a new mobile operating system meeting both Consumer market and enterprise market needs and named it Windows Phone 7.
Windows phone 7 was introduced for the first time in Mobile world Congress in Barcelona, Spain on 15th February 2010. The SDK was made available 6 months later on 16th September 2010.
Languages Supported By Windows Phone 7:
|
English
|
|
French
|
|
German
|
|
Italian
|
|
Spanish
|
Windows Phone 7 Market Place:
Like Apple’s App Store and Android Market, Windows Market Place is a platform for windows phone 7 developers and user to buy and sell applications, music, and video content. Currently Windows Market Place is available in following countries.
- Australia
- Austria
- Belgium
- Canada
- France
- Germany
- Hong Kong
- India
- Ireland
- Italy
- Mexico
- New Zealand
- Singapore
- Spain
- Switzerland
- Puerto Rico
- United Kingdom
- United States
Windows Phone 7 Development:
Windows Phone 7 development can be easily done by using Microsoft Technologies, it is very easy especially for .Net developers as they are already familiar with these technologies and can start writing applications quickly.
System Requirements:
|
Operating System
|
Windows® 7 (x86 and x64) – all editions except Starter Edition
|
|
Windows® Vista® (x86 and x64) with Service Pack 2 – all editions except Starter Edition
|
|
Hardware
|
2 GB of RAM
|
|
3 GB of free disk space on the system drive.
|
|
DirectX® 10 Compatible or later graphics card with WDDM 1.1 driver.
|
Development Tools:
All the necessary development tools are available in one single package that can be download from here.
Following tools are included in this package.
- Microsoft Visual Studio 2010 Express for Windows Phone
o Visual Studio 2010 Express for Windows Phone is a specialized IDE for building Windows Phone 7 Applications.
- Expression Blend 4
o Expression Blend 4 is used to design Windows phone 7 Applications, you can create XAML based interfaces for applications.
- Silverlight for Windows Phone
o Framework to build Windows Phone 7 Applications
- XNA Game Studio
o Mobile games are always attractive. Windows Phone 7 Tools include XNA Game Studio to create exciting and attractive games for windows Phone 7.
- Windows Phone Emulator
o A simulator to debug and test your application and games on pc without requiring a real phone.
- Phone Registration Tool
o It is used to transfer your application on a real phone.
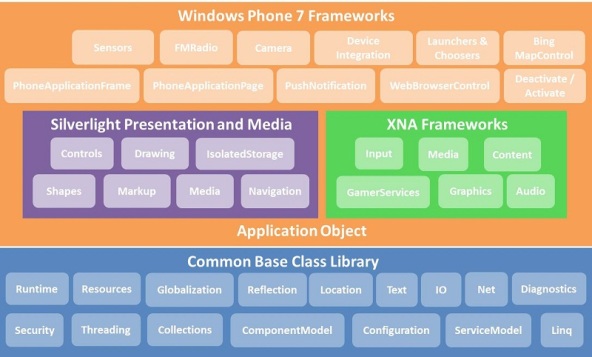
Windows Phone 7 Application Framework:
Windows Phone 7 will run on multiple phones so it defines a minimum set of hardware specifications that all phones must meet like Direct X Capable GPU, Camera, Multi touch Capacitive Display, GPS, Accelerometer, compass, proximity, light sensors etc .
Setting up the working Environment:
To create a windows phone 7 application you need to download Windows Phone Developer Tools from this link for free.
http://www.microsoft.com/downloads/en/details.aspx?FamilyID=04704acf-a63a-4f97-952c-8b51b34b00ce
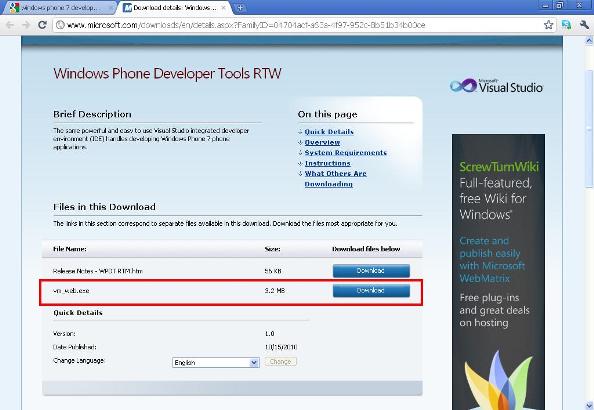
You can first download vm_web.exe and then it will download all the required tools needed for windows phone 7 development.
Creating your first Windows phone 7 Application:
Now we will write a simple Hello World application for windows phone 7.
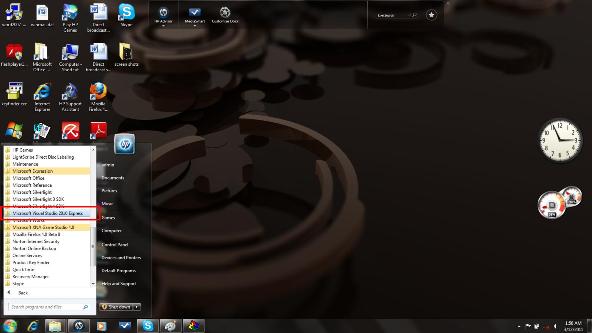
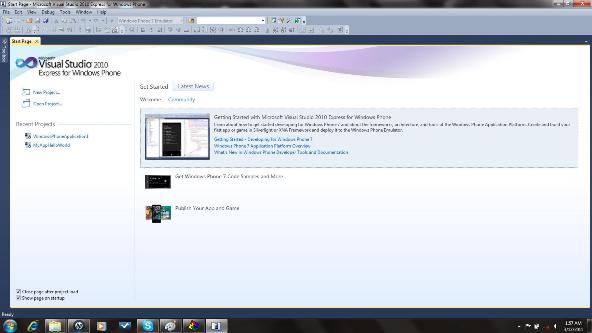
1 Go to Start and click Visual Studio 2010 Express.
2 Now click on Microsoft Visual Studio 2010 Express For Windows Phone
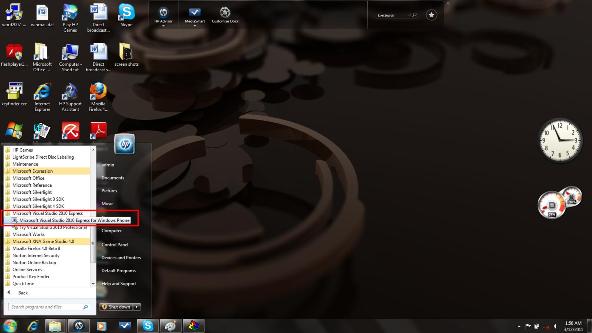
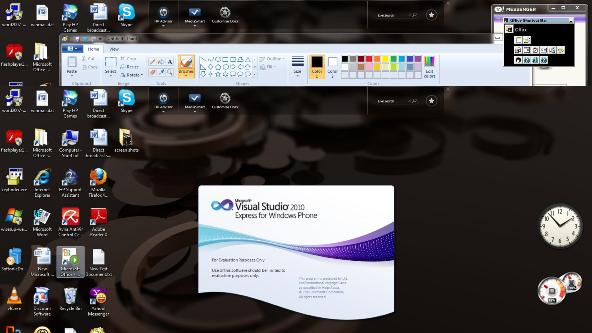
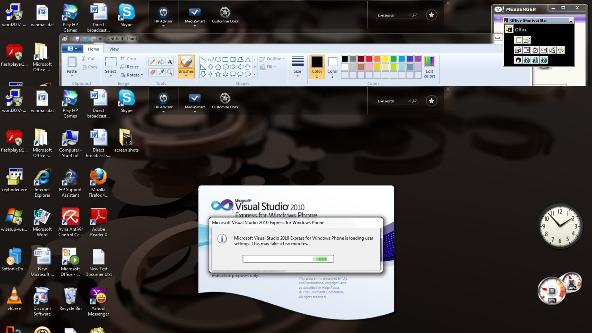
It will take some time for the first time when you start Visual Studio 2010 Express.
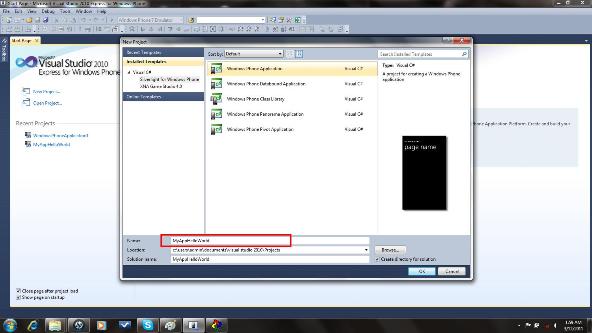
3 Now Click on New Project
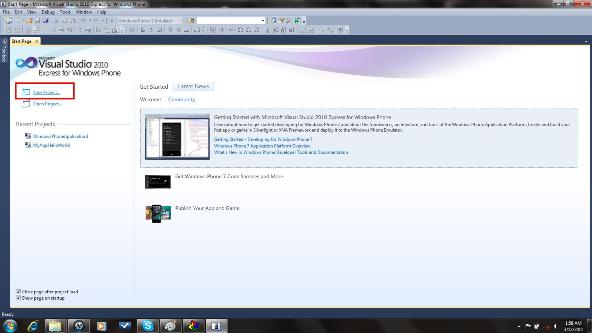
4 When you click on New Project, A new window opens. Here we have to do three things
4.1 Choosing a template to write an application either SilverLight or XNA Framework.
4.2 Selecting Application Type
4.3 Naming your application
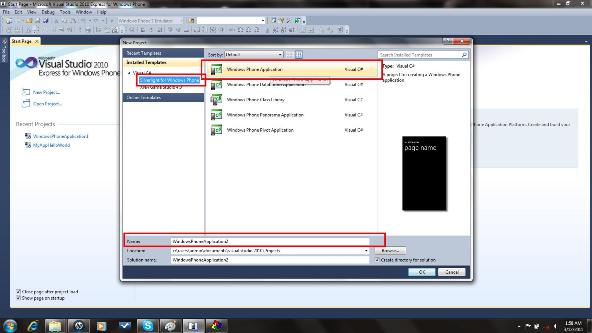
5 We have chosen Silver Light for windows phone 7 as template, Windows Phone Application as type and named our application MyAppHelloWorld.
6 Visual Studio will create a project for you and open a window which is divided in two three parts.
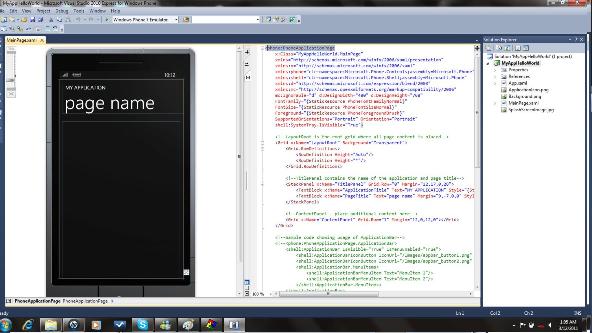
In the solution explorer pain you can easily see your project files.
Lets take a look at some of the important files that are generated and how they are essential in our Hello World Application.
a- App.xaml
b- MainPage.xaml
c- ApplicationIcon.png
d- Background.png
e- SplashScreenImage.jpg
App.xaml:
App.xaml is file which contains information about the application it self or in other words its basically a meta data for the application. All XAML related controls to your application are declared here. Global variables can also be declared in this file.
Code:
<Application
x:Class="MyAppHelloWorld.App"
xmlns="http://schemas.microsoft.com/winfx/2006/xaml/presentation"
xmlns:x="http://schemas.microsoft.com/winfx/2006/xaml"
xmlns:phone="clr-namespace:Microsoft.Phone.Controls;assembly=Microsoft.Phone"
xmlns:shell="clr-namespace:Microsoft.Phone.Shell;assembly=Microsoft.Phone">
<!--Application Resources-->
<Application.Resources>
</Application.Resources>
<Application.ApplicationLifetimeObjects>
<!--Required object that handles lifetime events for the application-->
<shell:PhoneApplicationService
Launching="Application_Launching" Closing="Application_Closing"
Activated="Application_Activated" Deactivated="Application_Deactivated"/>
</Application.ApplicationLifetimeObjects>
</Application>
MainPage.xaml:
Mainpage.xaml is the file that contains the layout for your applications screen, so basically in this file you declare all the UI elements and different layouts for your application.
Code:
<phone:PhoneApplicationPage
x:Class="MyAppHelloWorld.MainPage"
xmlns="http://schemas.microsoft.com/winfx/2006/xaml/presentation"
xmlns:x="http://schemas.microsoft.com/winfx/2006/xaml"
xmlns:phone="clr-namespace:Microsoft.Phone.Controls;assembly=Microsoft.Phone"
xmlns:shell="clr-namespace:Microsoft.Phone.Shell;assembly=Microsoft.Phone"
xmlns:d="http://schemas.microsoft.com/expression/blend/2008"
xmlns:mc="http://schemas.openxmlformats.org/markup-compatibility/2006"
mc:Ignorable="d" d:DesignWidth="480" d:DesignHeight="768"
FontFamily="{StaticResource PhoneFontFamilyNormal}"
FontSize="{StaticResource PhoneFontSizeNormal}"
Foreground="{StaticResource PhoneForegroundBrush}"
SupportedOrientations="Portrait" Orientation="Portrait"
shell:SystemTray.IsVisible="True">
<!--LayoutRoot is the root grid where all page content is placed-->
<Grid x:Name="LayoutRoot" Background="/portals/0/Transparent">
<Grid.RowDefinitions>
<RowDefinition Height="Auto"/>
<RowDefinition Height="*"/>
</Grid.RowDefinitions>
<!--TitlePanel contains the name of the application and page title-->
<StackPanel x:Name="TitlePanel" Grid.Row="0" Margin="12,17,0,28">
<TextBlock x:Name="ApplicationTitle" Text="MY First Windows Phone 7 App" Style="{StaticResource PhoneTextNormalStyle}"/>
<TextBlock x:Name="PageTitle" Text="Hello World " Margin="9,-7,0,0" Style="{StaticResource PhoneTextTitle1Style}"/>
</StackPanel>
<!--Sample code showing usage of ApplicationBar-->
<!--<phone:PhoneApplicationPage.ApplicationBar>
<shell:ApplicationBar IsVisible="True" IsMenuEnabled="True">
<shell:ApplicationBarIconButton IconUri="/Images/appbar_button1.png" Text="Button 1"/>
<shell:ApplicationBarIconButton IconUri="/Images/appbar_button2.png" Text="Button 2"/>
<shell:ApplicationBar.MenuItems>
<shell:ApplicationBarMenuItem Text="MenuItem 1"/>
<shell:ApplicationBarMenuItem Text="MenuItem 2"/>
</shell:ApplicationBar.MenuItems>
</shell:ApplicationBar>
</phone:PhoneApplicationPage.ApplicationBar>-->
</phone:PhoneApplicationPage>
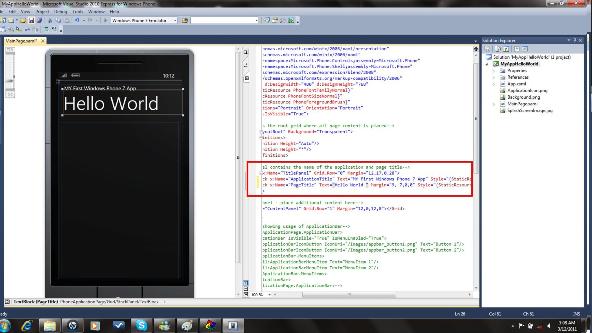
You can easily see that we have changed the following line of the code in our MainPage.xaml
To change application title to “My First Windows Phone 7 App”:
<TextBlock x:Name="ApplicationTitle" Text="MY First Windows Phone 7 App" Style="{StaticResource PhoneTextNormalStyle}"/>
To Change Page Title to “Hello World”:
<TextBlock x:Name="PageTitle" Text="Hello World " Margin="9,-7,0,0" Style="{StaticResource PhoneTextTitle1Style}"/>
ApplicationIcon.png:
The application icon in png format.
Background.png:
The application background resource in png format.
SplashScreenImage.jpg
The jpg resource that will be used as a splash screen when the application gets started.
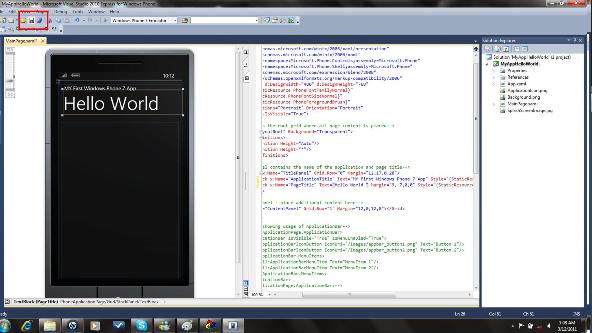
Now our target is to make a hello world application. For this we have changed the application title and page titles to our custom titles. As we have changed the Application title text to “My First Windows 7 App” and page title to “Hello World”.
<!--TitlePanel contains the name of the application and page title-->
<StackPanel x:Name="TitlePanel" Grid.Row="0" Margin="12,17,0,28">
<TextBlock x:Name="ApplicationTitle" Text="MY First Windows Phone 7 App" Style="{StaticResource PhoneTextNormalStyle}"/>
<TextBlock x:Name="PageTitle" Text="Hello World " Margin="9,-7,0,0" Style="{StaticResource PhoneTextTitle1Style}"/>
</StackPanel>
8 Save the project.
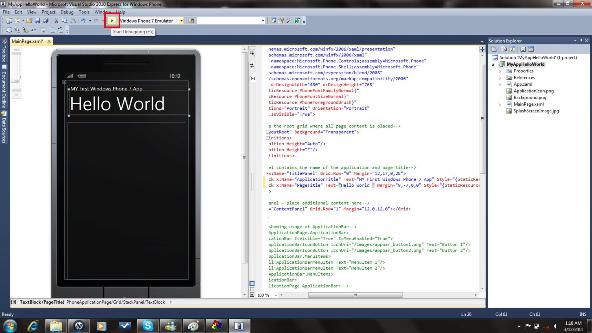
9 Your first windows phone 7 application is ready to run. Now you can select windows Phone 7 Emulator from the top pane to run your application.

10 Press start debugging button.
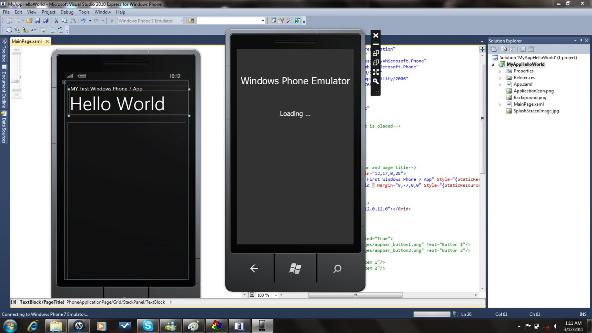
It will take some time to load your application
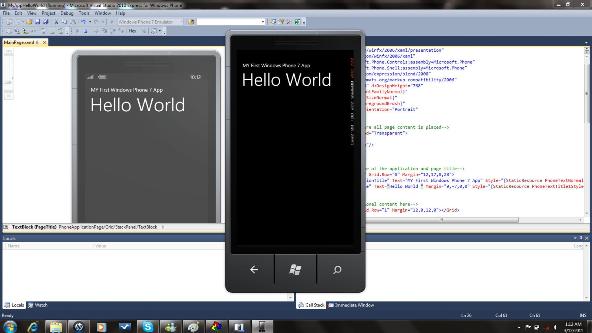
Here it is, your first windows phone 7 application running successfully on emulator.
You can download the complete source code of the above application from here.